Open Code
Windows
1. Install OpenCode
In PowerShell run:
After the installation is complete,close and reopen PowerShelland then verify the installation:

Script execution policy issue
If you encounter the error "Running scripts is disabled on this system":
- As administrator run PowerShell
- Execute:
Set-ExecutionPolicy Unrestricted - Enter
Yand confirm, then retry the installation command
2. Create a configuration file
First run the opencode command once; this will create the configuration folder.
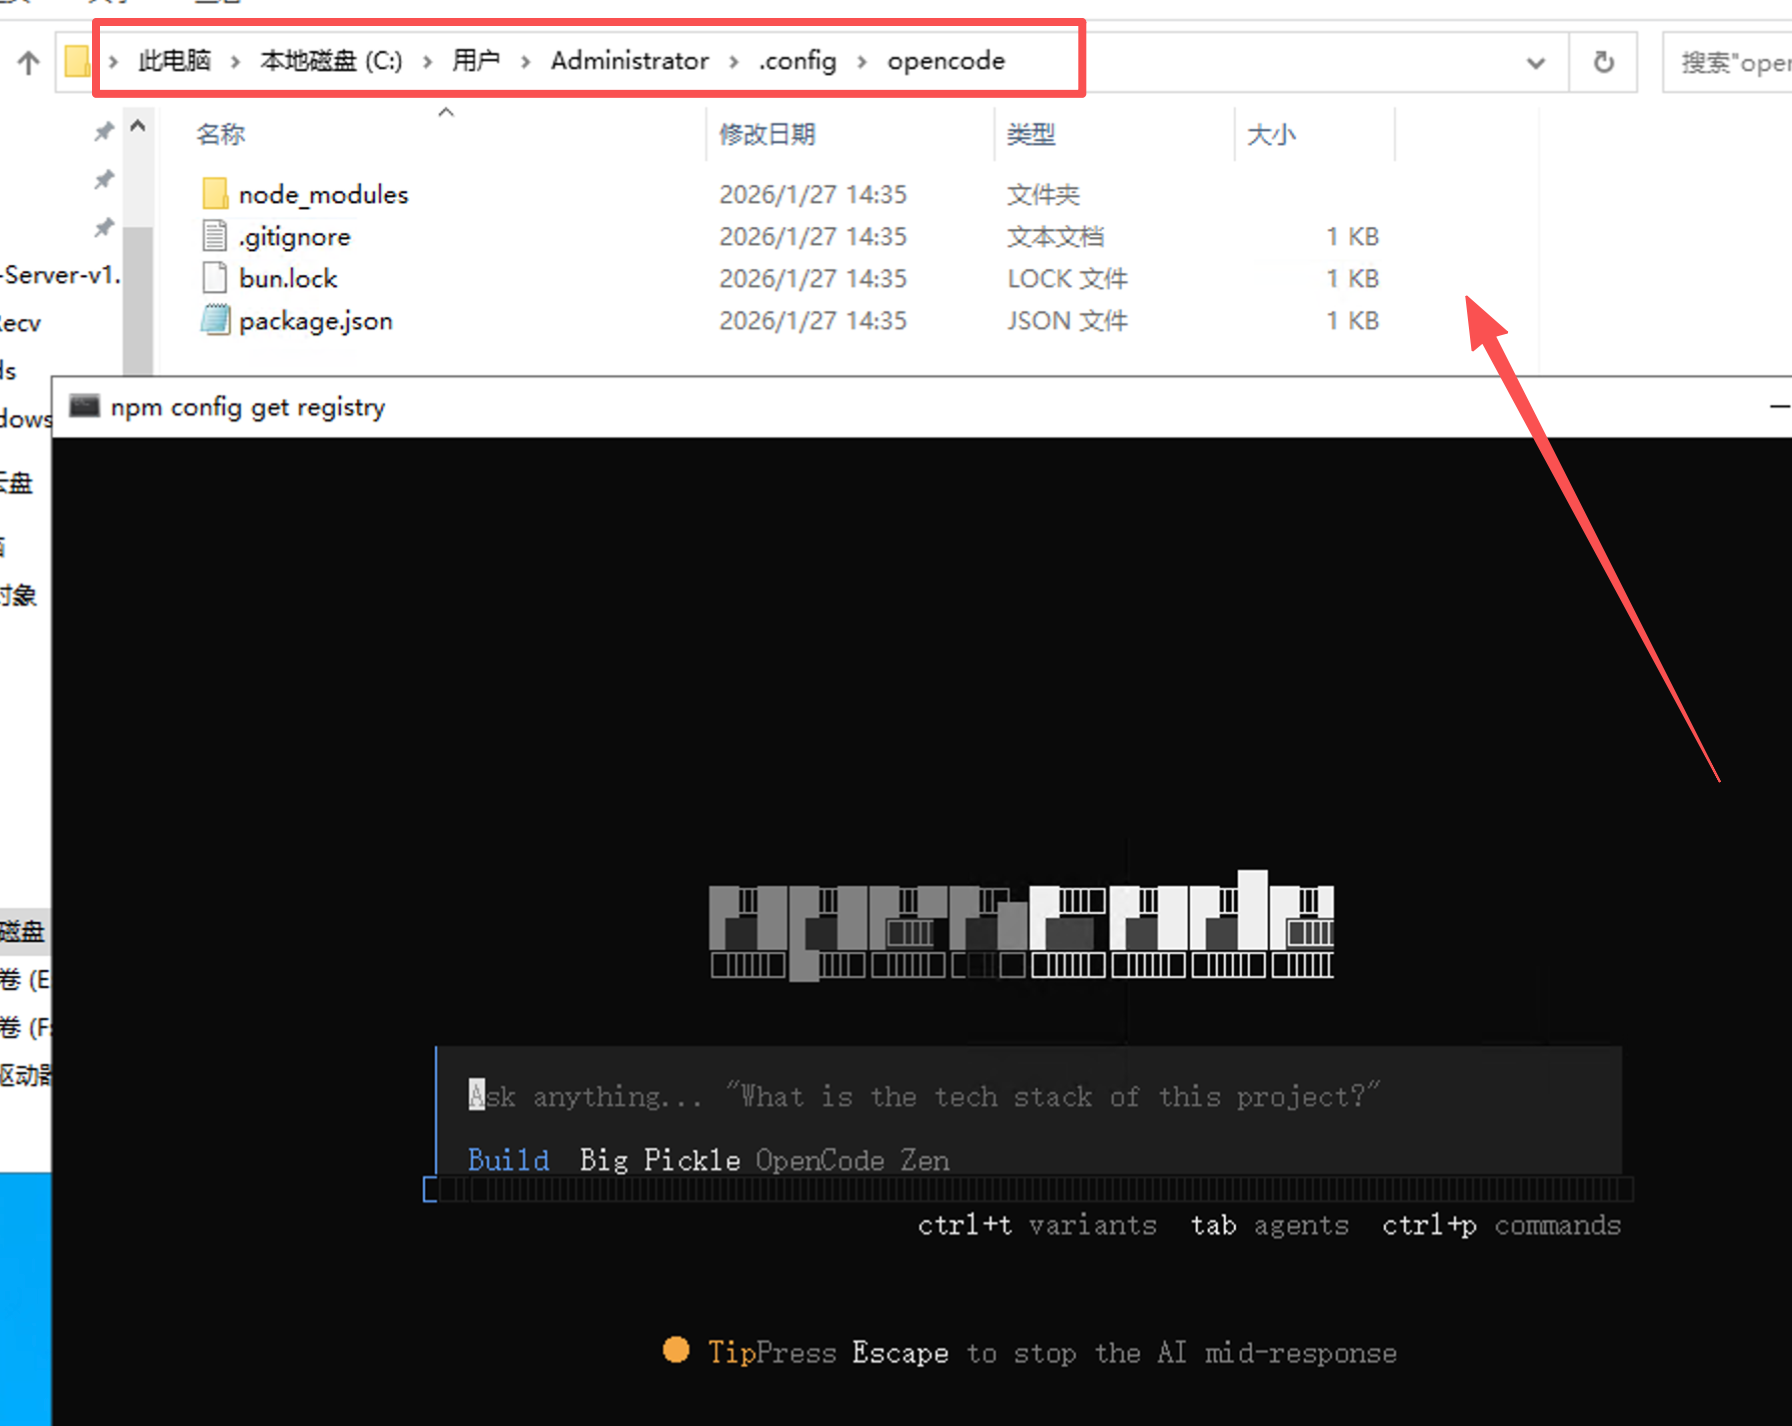
Then create opencode.json under ~/.config/opencode with the following content
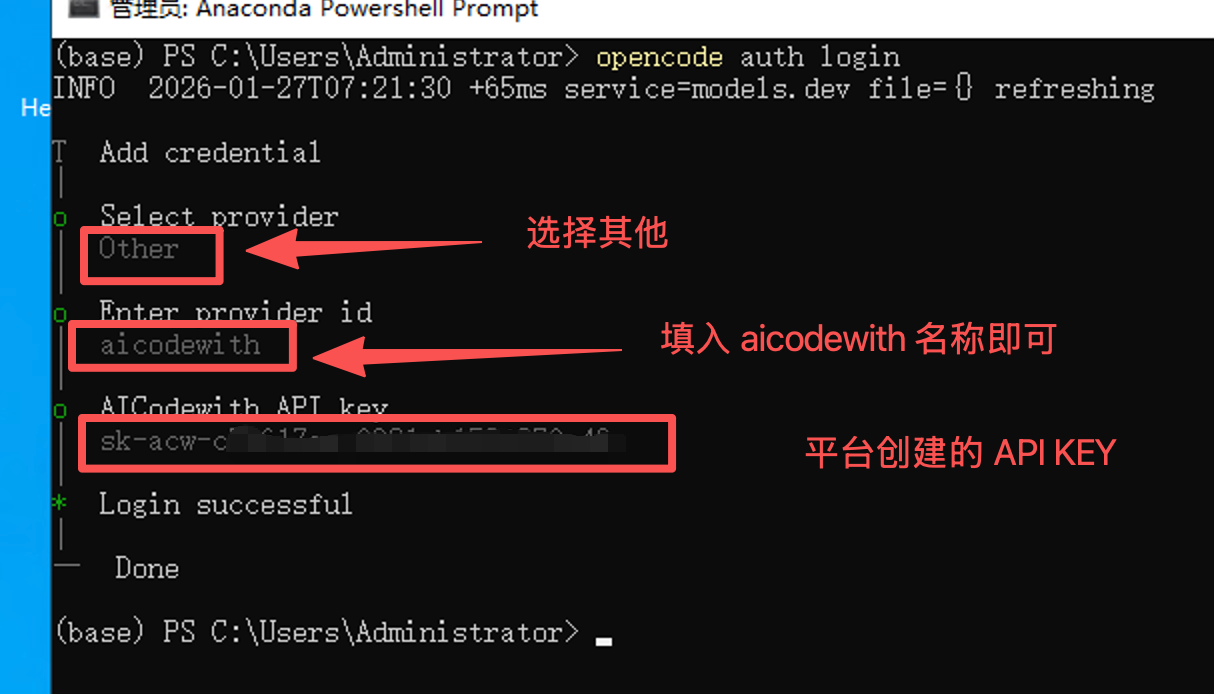
3. Enter authentication information
Enter the following command in PowerShell to start the authentication process:
4. Verify the installation
Reopen PowerShell or your IDE and run:
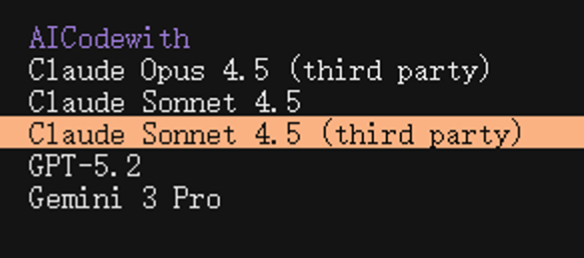
Then enter /models . If the providers are displayed correctly, the configuration is successful.
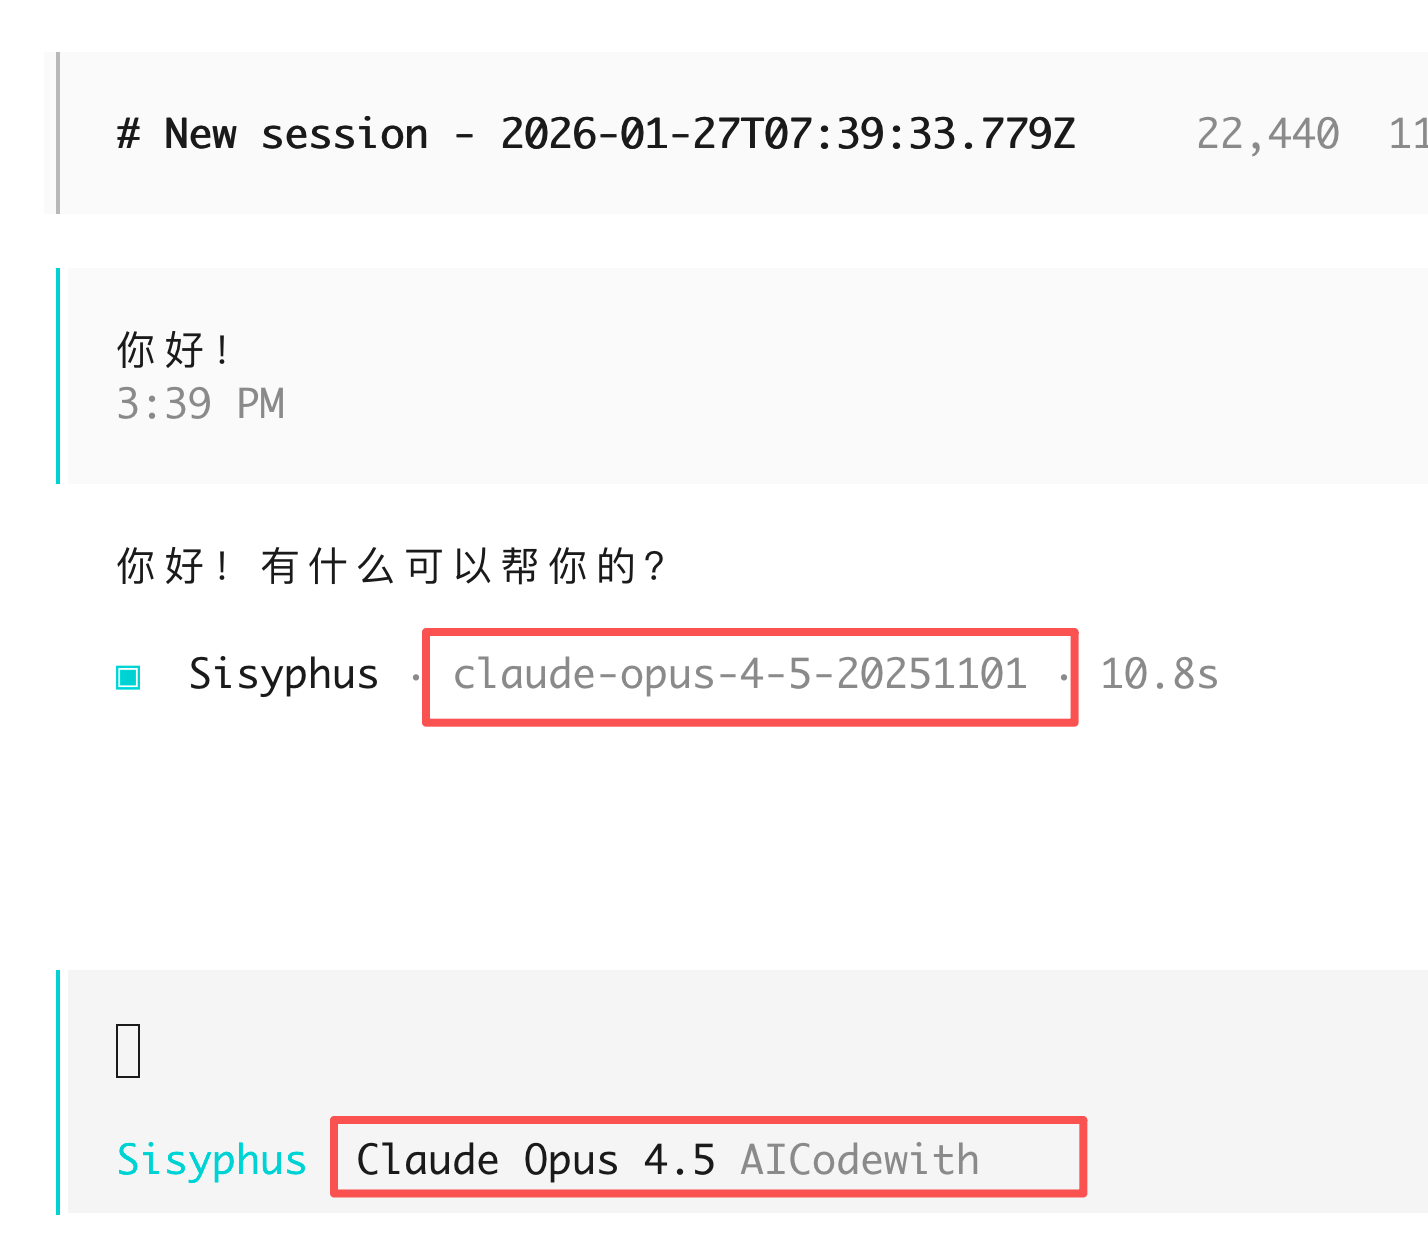
Enter in the dialog box:Hello!If you receive a normal reply and can see the call record on the AICodeWith platform, the configuration is successful.
MacOS/Linux
1. Install OpenCode
In the terminal run:
Enter the following command in the terminal to verify the installation:

2. Create a configuration file
First run the opencode command once; this will create the configuration folder.
Then create opencode.json under ~/.config/opencode with the following contents
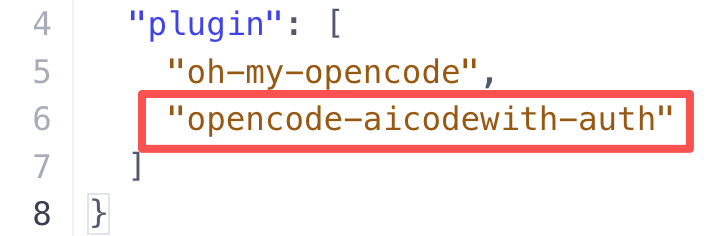
If you’ve used it before and already have your own configuration, you just need to add plugin to the list and fill in the name opencode-aicodewith-auth, and it’s recommended to add one more plugin, oh-my-opencode, which is also very useful.
3. Enter authentication information
Enter the following command in the terminal to start the authentication process:

4. Verify the installation
Reopen the terminal or IDE and run:
In the dialog box, enter:Hello!If you receive a normal reply and can see the call record on the AICodeWith platform, the configuration is successful.
How to use
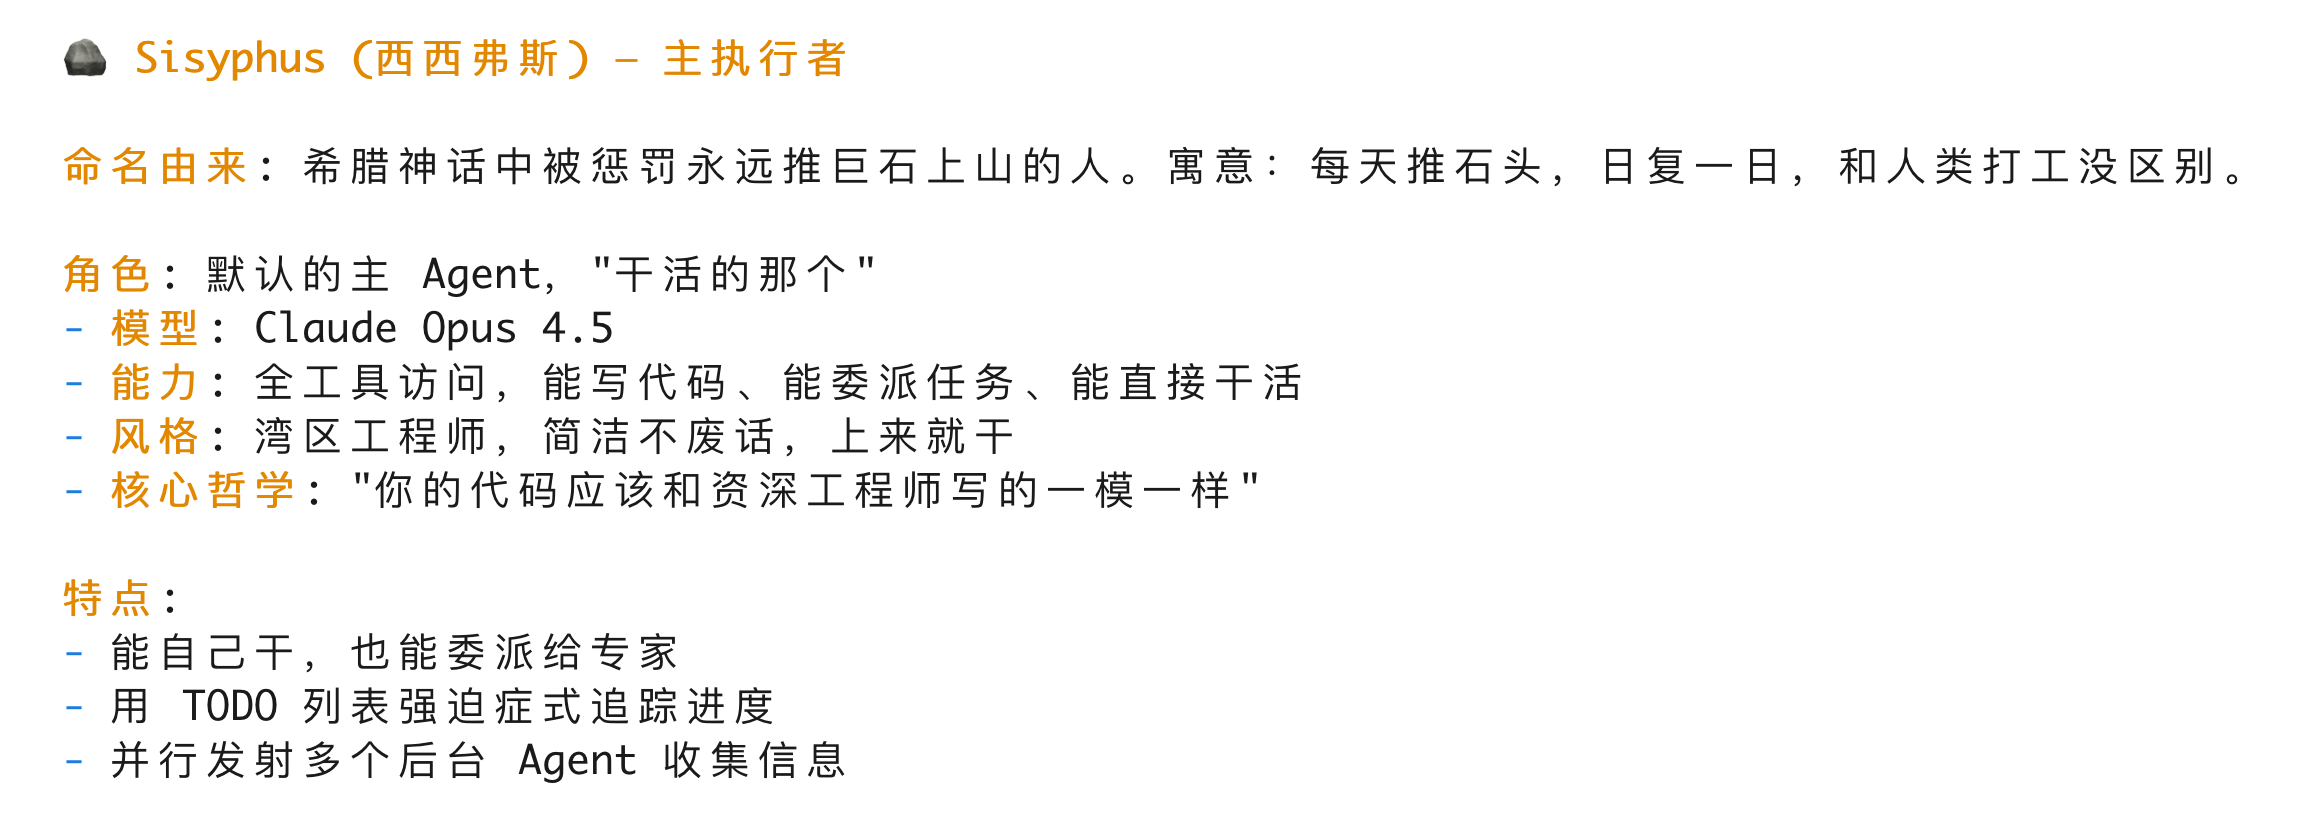
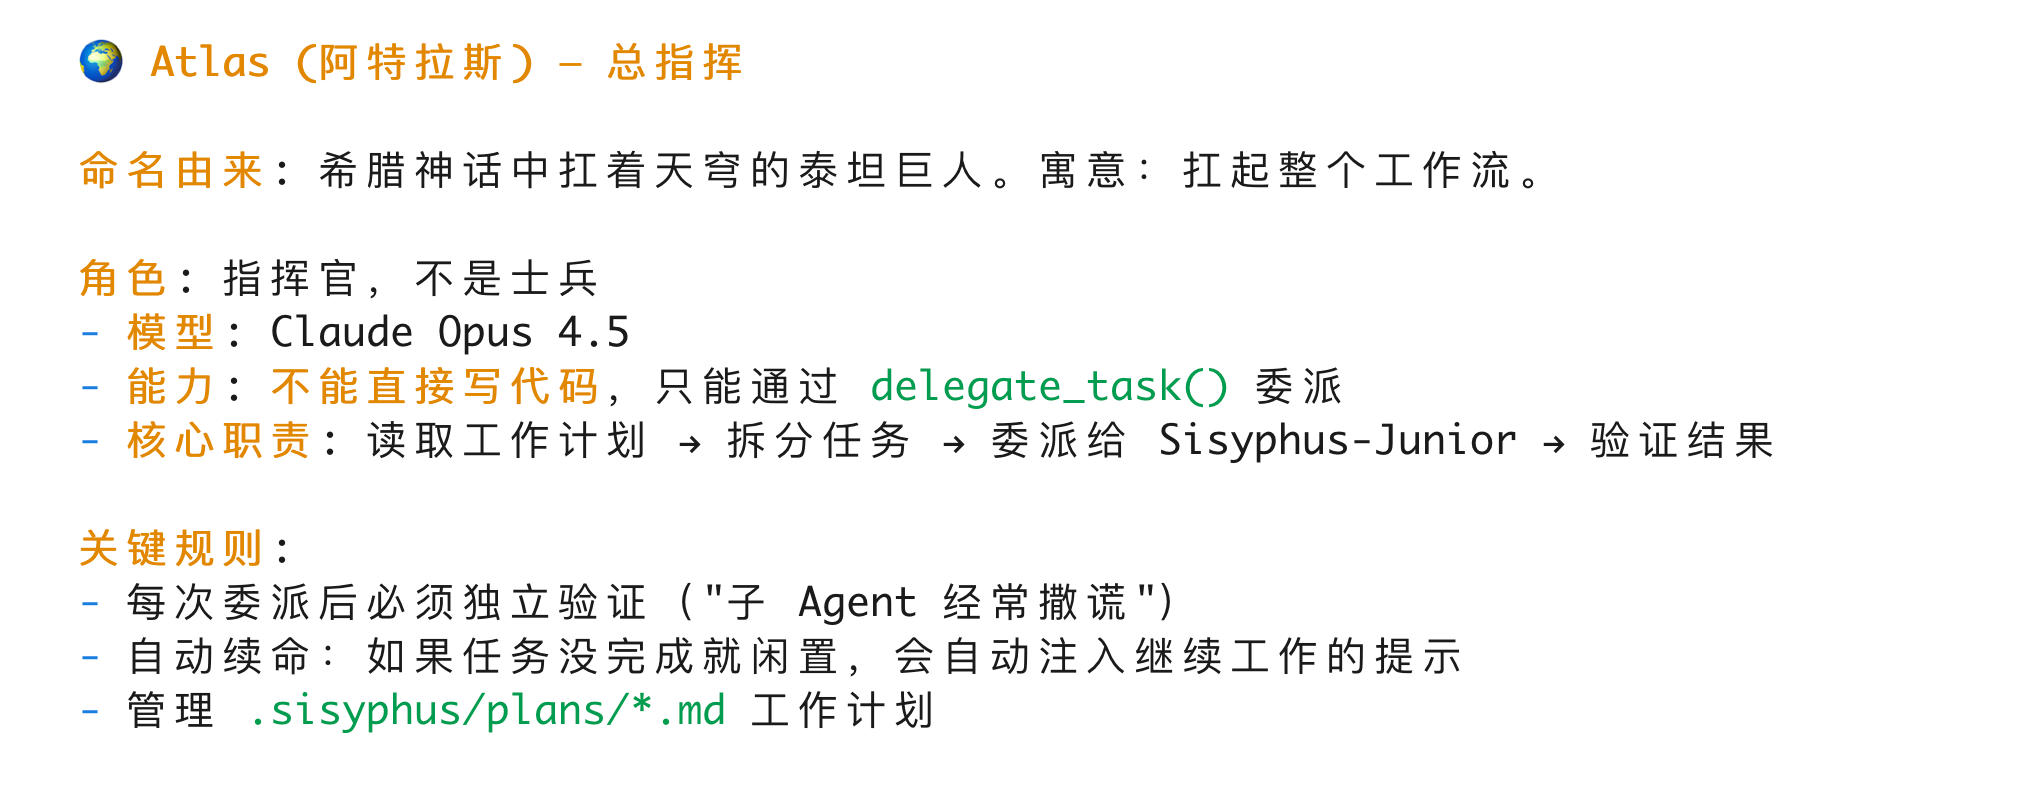
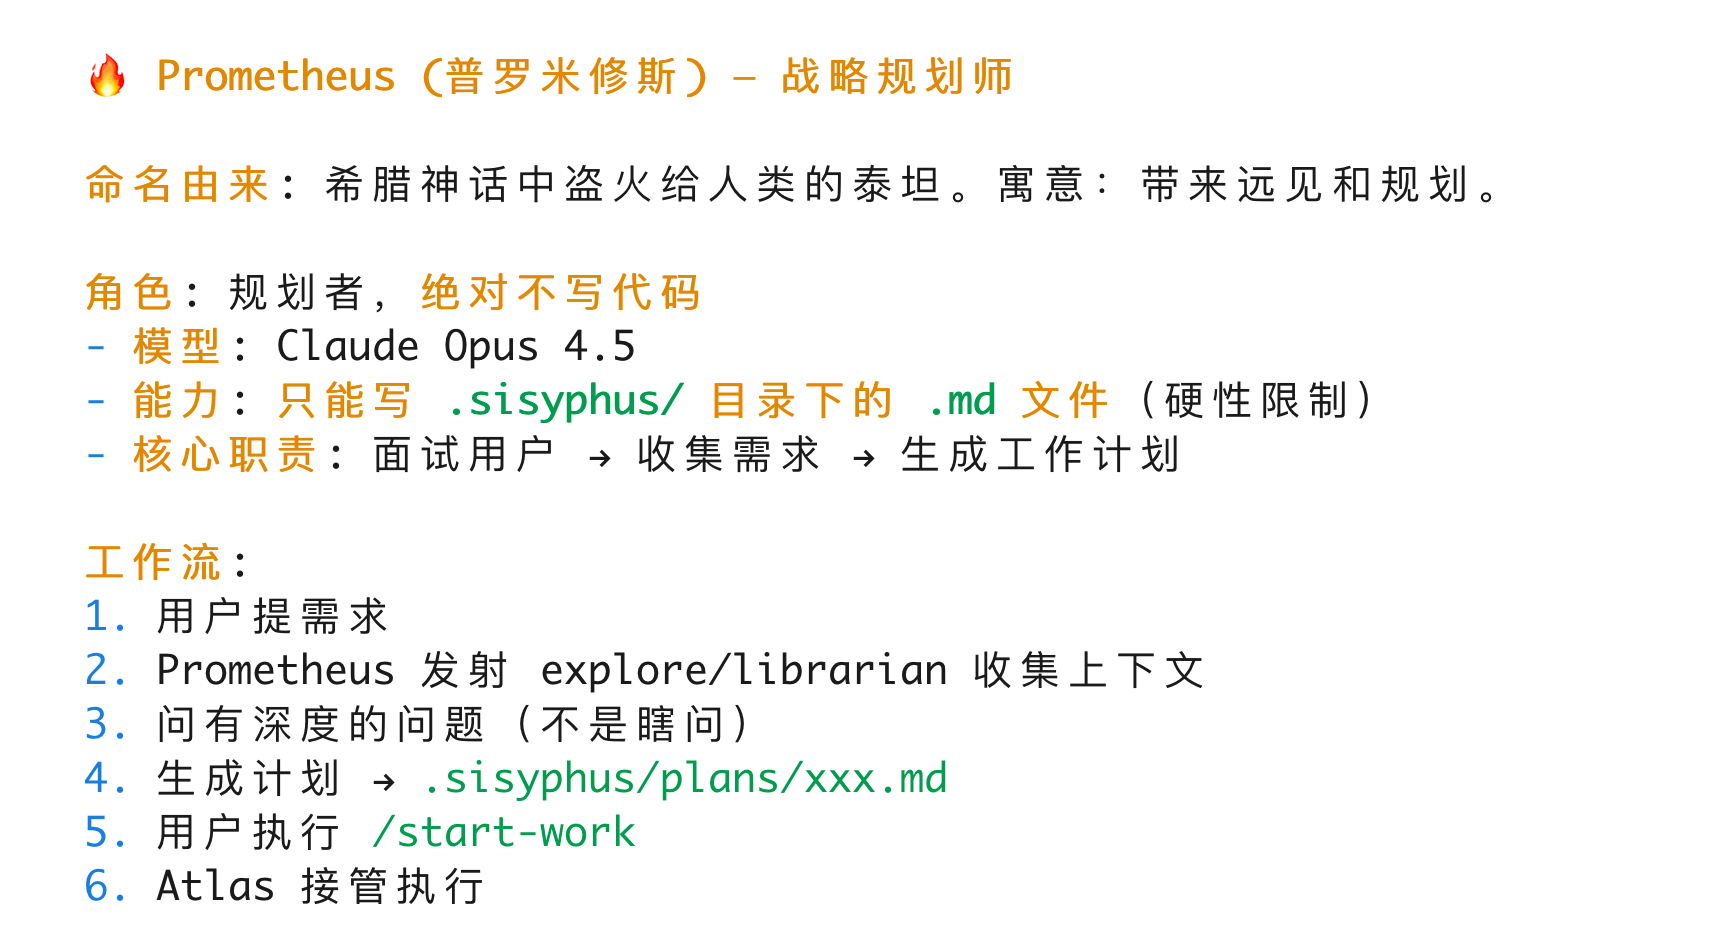
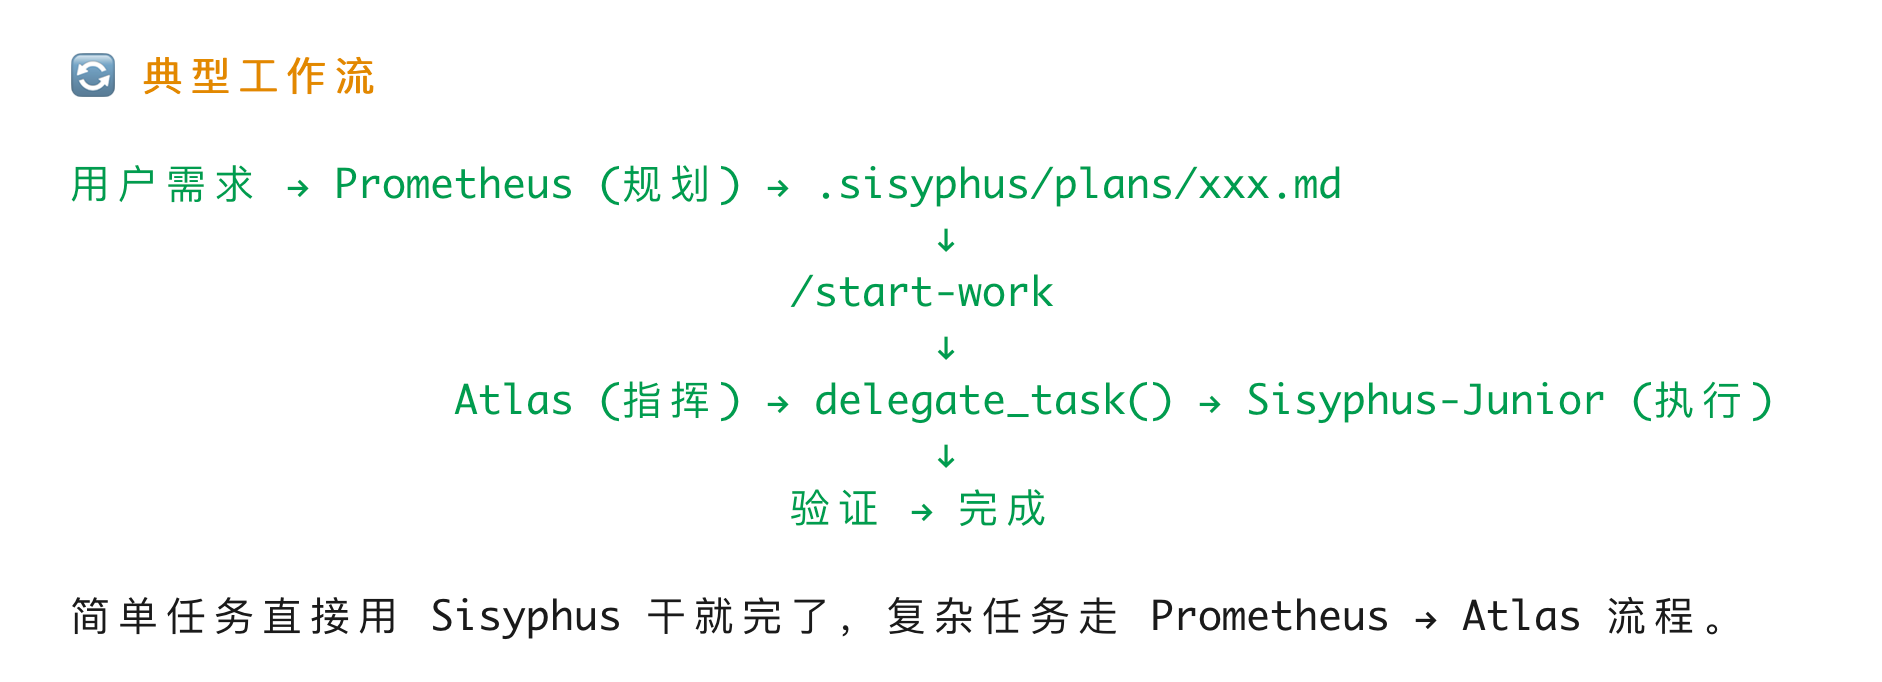
opencode has three main agents that talk to us directly and handle the integration
They are respectively: Sisyphus (西西弗斯)

Frequently Asked Questions
- BunInstallFailedError
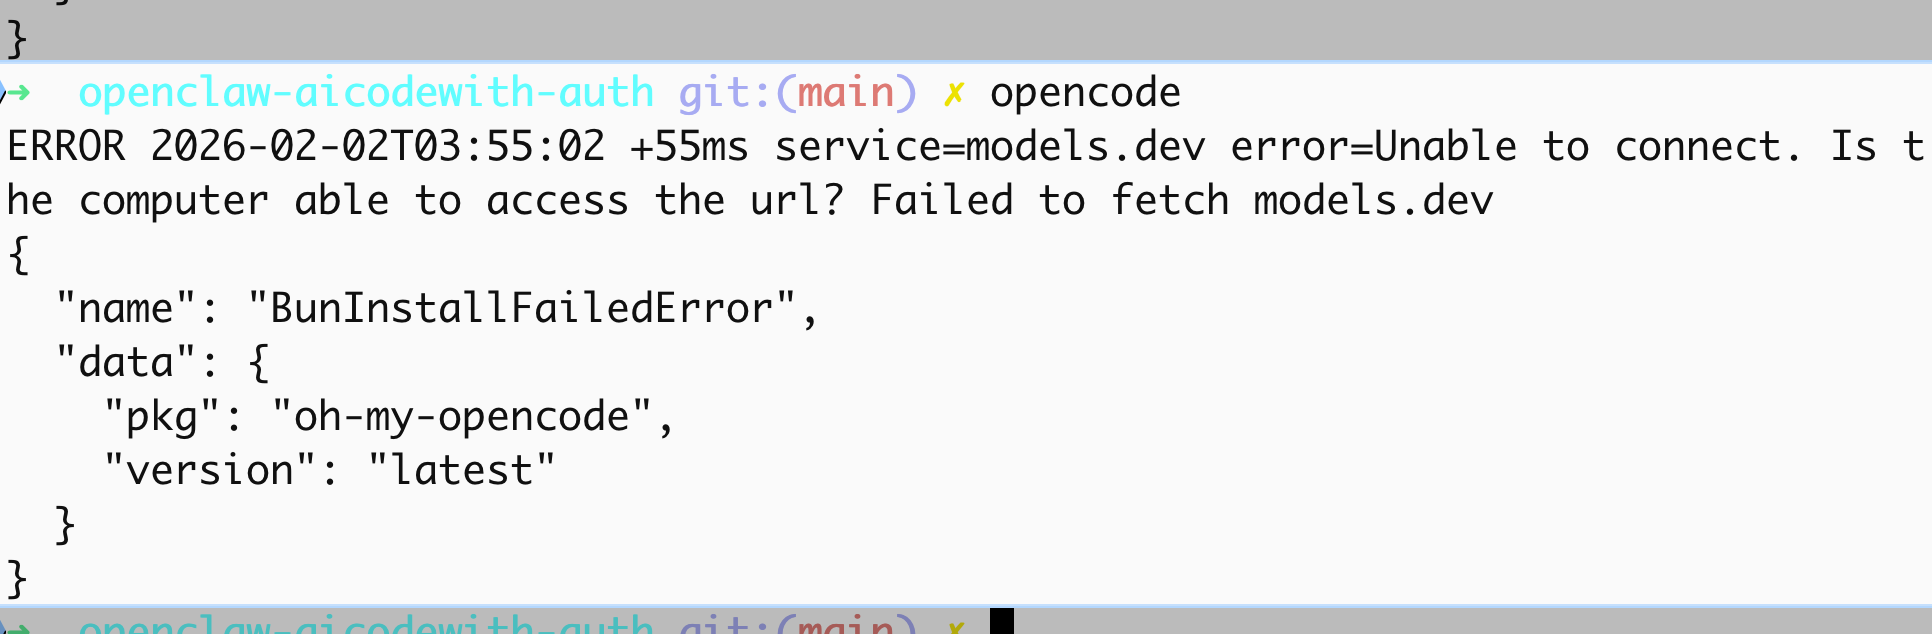
This error occurs because the oh my opencode plugin needs to pull the models.dev part from a remote source, and if it can’t fetch it, it will throw this error.
The solution is to enable TUN mode. If TUN mode is already enabled, just toggle it off and on again.