Claude Code
Install and configure the Claude Code CLI (command-line tool) on your computer using a configuration file
If you run into any issues, you can take a screenshot of this entire page and your problem, then copy them to Doubao or deepseek or another AI, and follow its instructions to run the corresponding commands.
If the AI is also unable to resolve the issue, you can contact our engineers for technical support and assistance.
Windows
1. Install Node.js / Git
Go to the Node.js official website to download and install the LTS version. (If it is already installed, you can skip this step.)
Verify the installation:
If you see the following message, it means that Node has been installed successfully.

Note that the Node.js version must be 18 or higher.
If your version is lower than this, you can ask the AI how to upgrade your Node.js version. First, have the AI give you commands to collect your system information, and then it will provide the fastest and most accurate guidance.
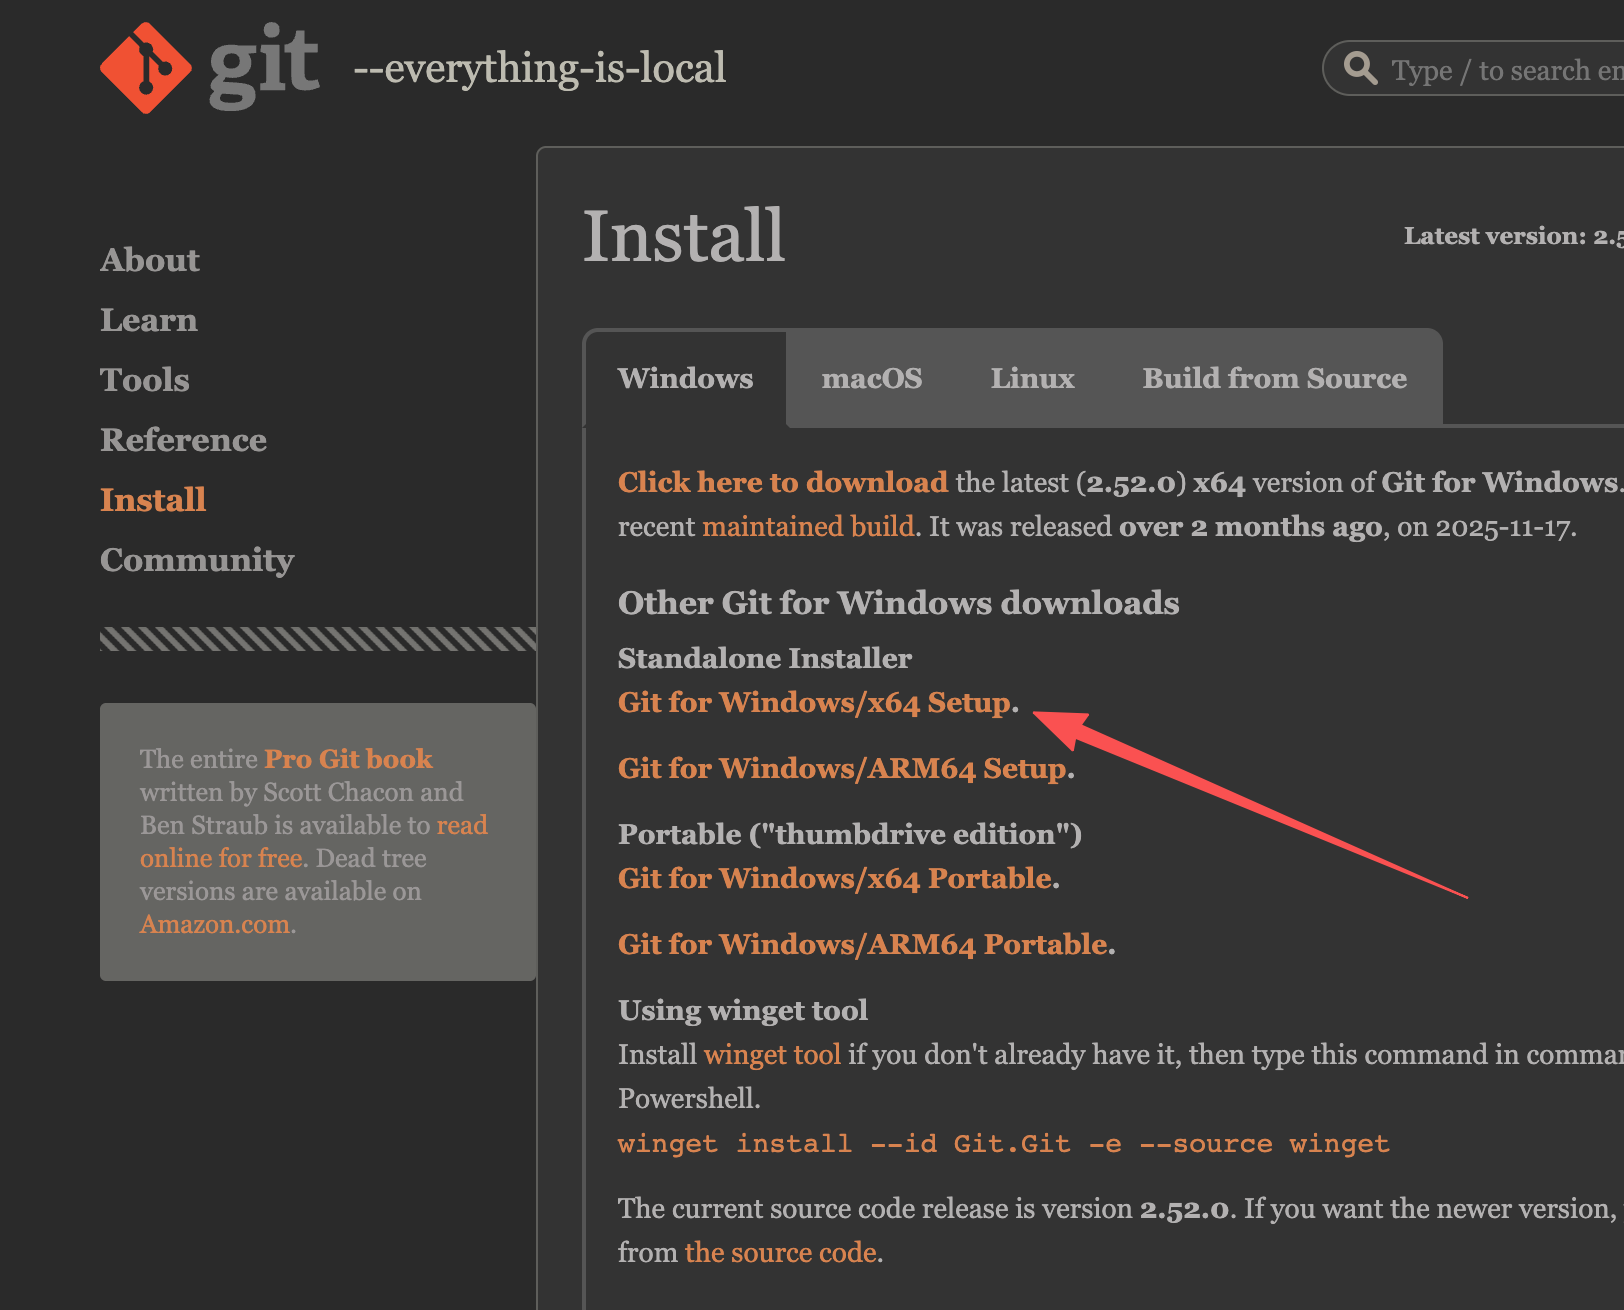
Go to the official Git website, download the installer, and just keep clicking Yes all the way through. It’s all in English, so you don’t need to worry about the details.
2. Install Claude Code CLI
Open PowerShell (it is recommended to run as administrator) and execute:

If you encounter a restriction that prevents scripts from running on this system, you need to run PowerShell with administrator privileges, and then execute Set-ExecutionPolicy Unrestricted command
3. Create a configuration file
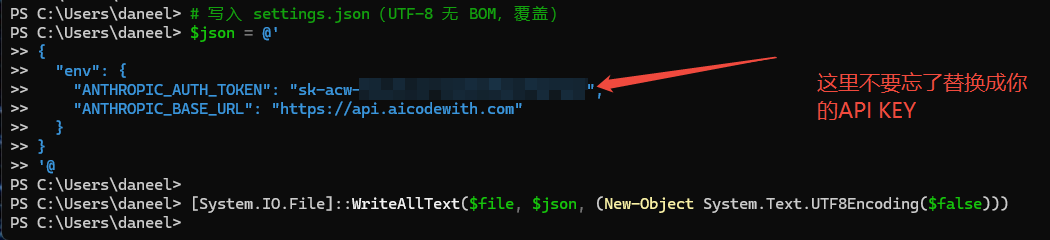
Open PowerShell (it is recommended to run as administrator) and execute:
4. Verify the installation
Reopen PowerShell or your IDE and run:
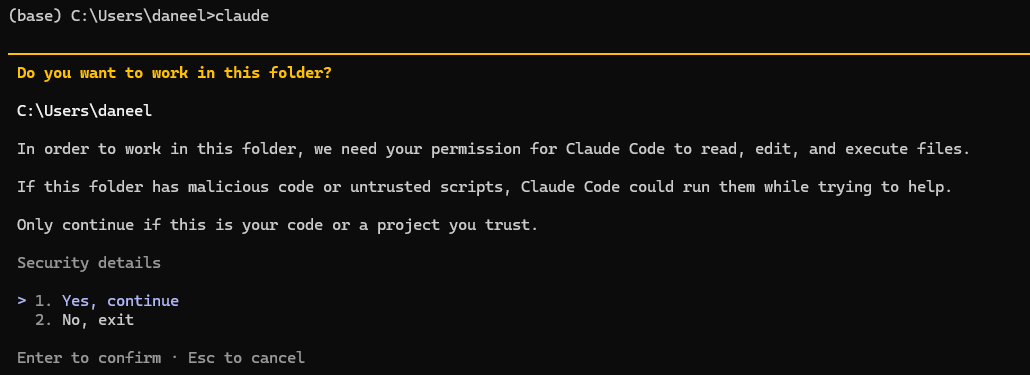
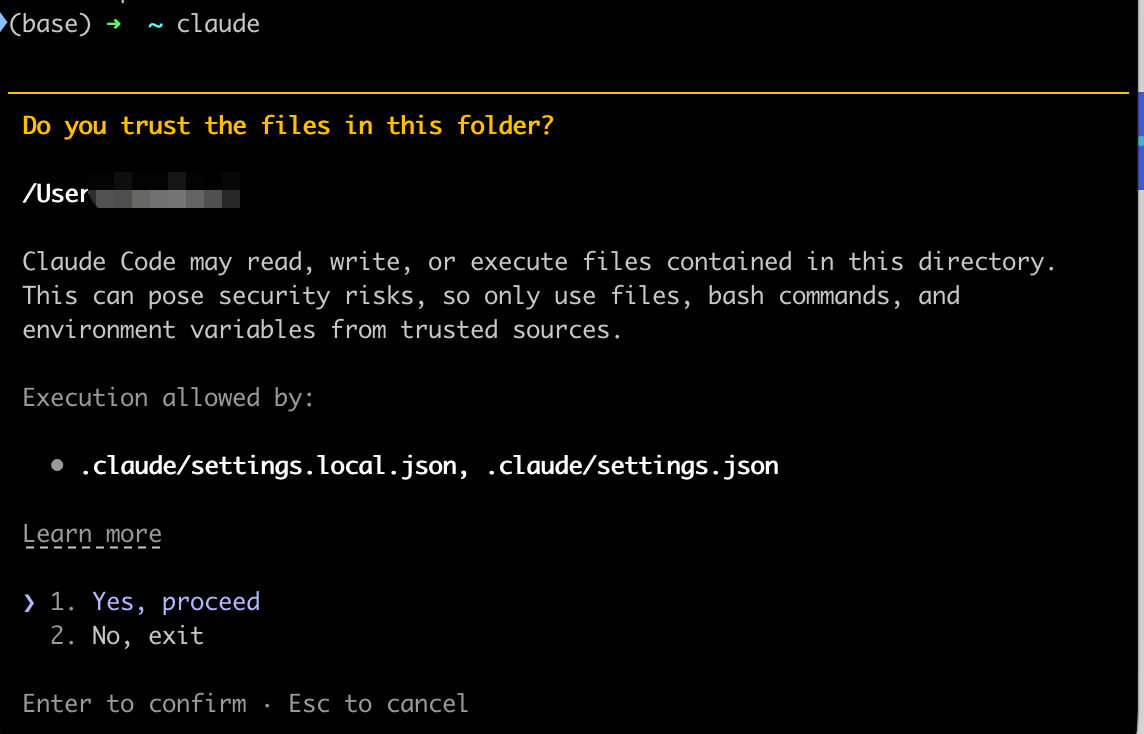
If you see the following prompt, select the first "yes" option and then press Enter.
This is asking you to authorize Claude Code to access and execute the code in the current folder, so it can read, modify, and run project files.
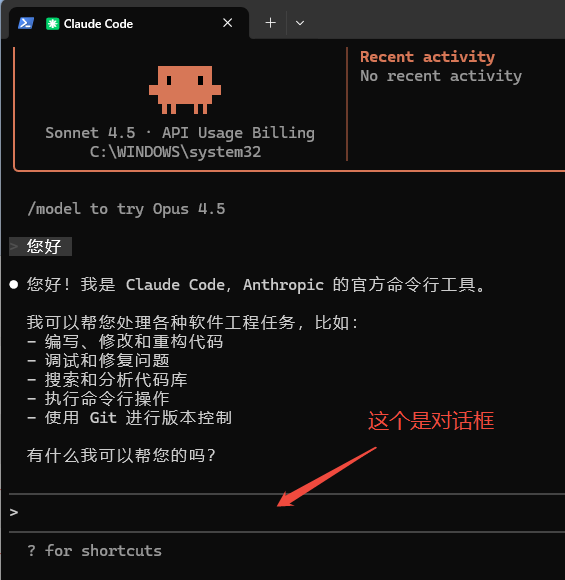
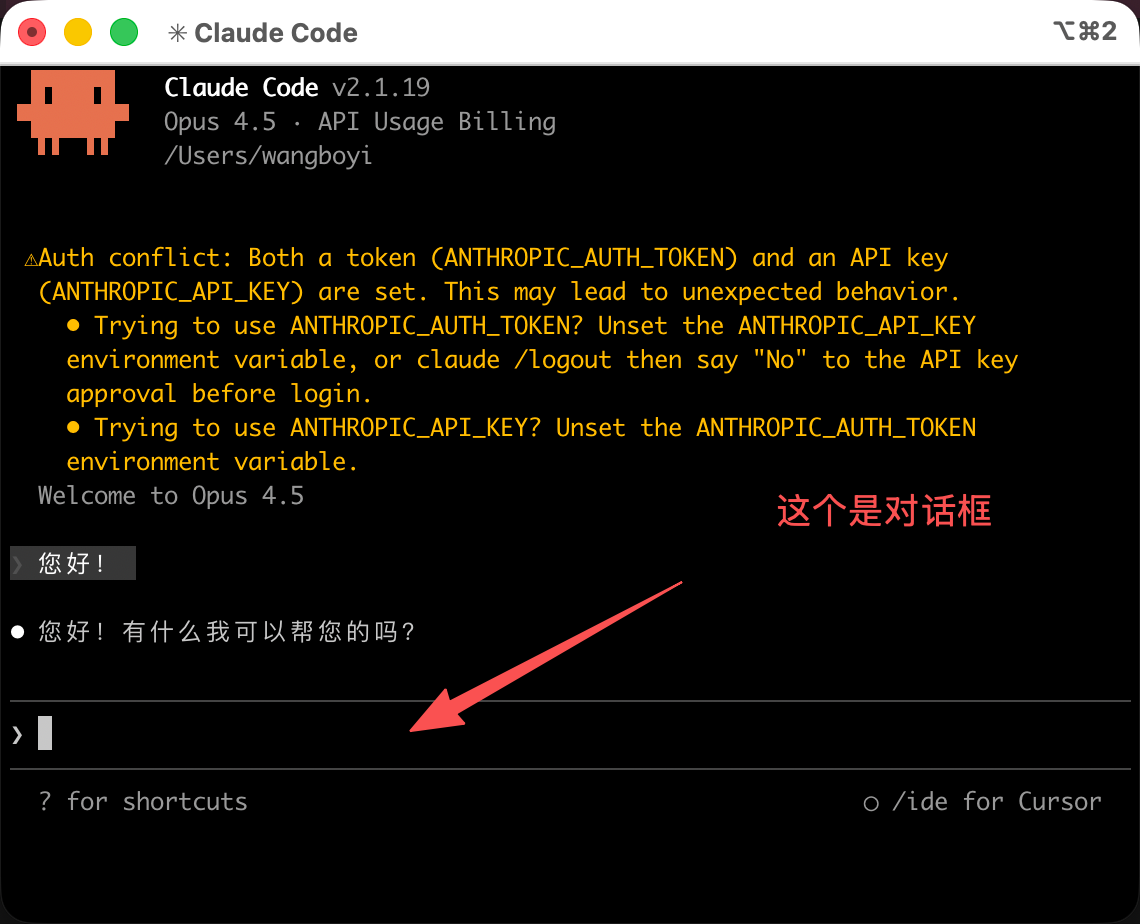
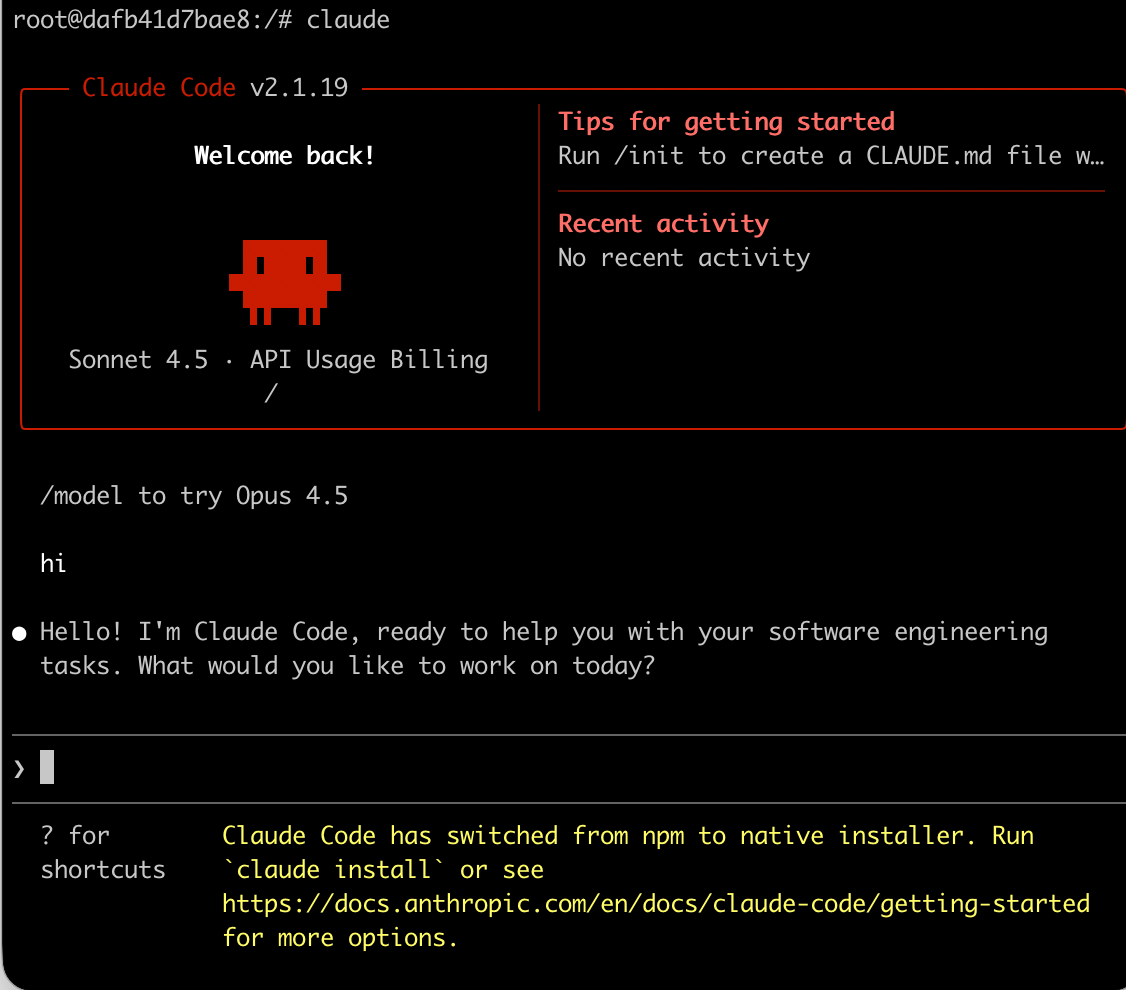
Next, you can enter the following in the dialog box: Hello! If you receive a normal reply and there is a correct invocation record in the backend, it means the configuration was successful.

macOS
1. Install Node.js
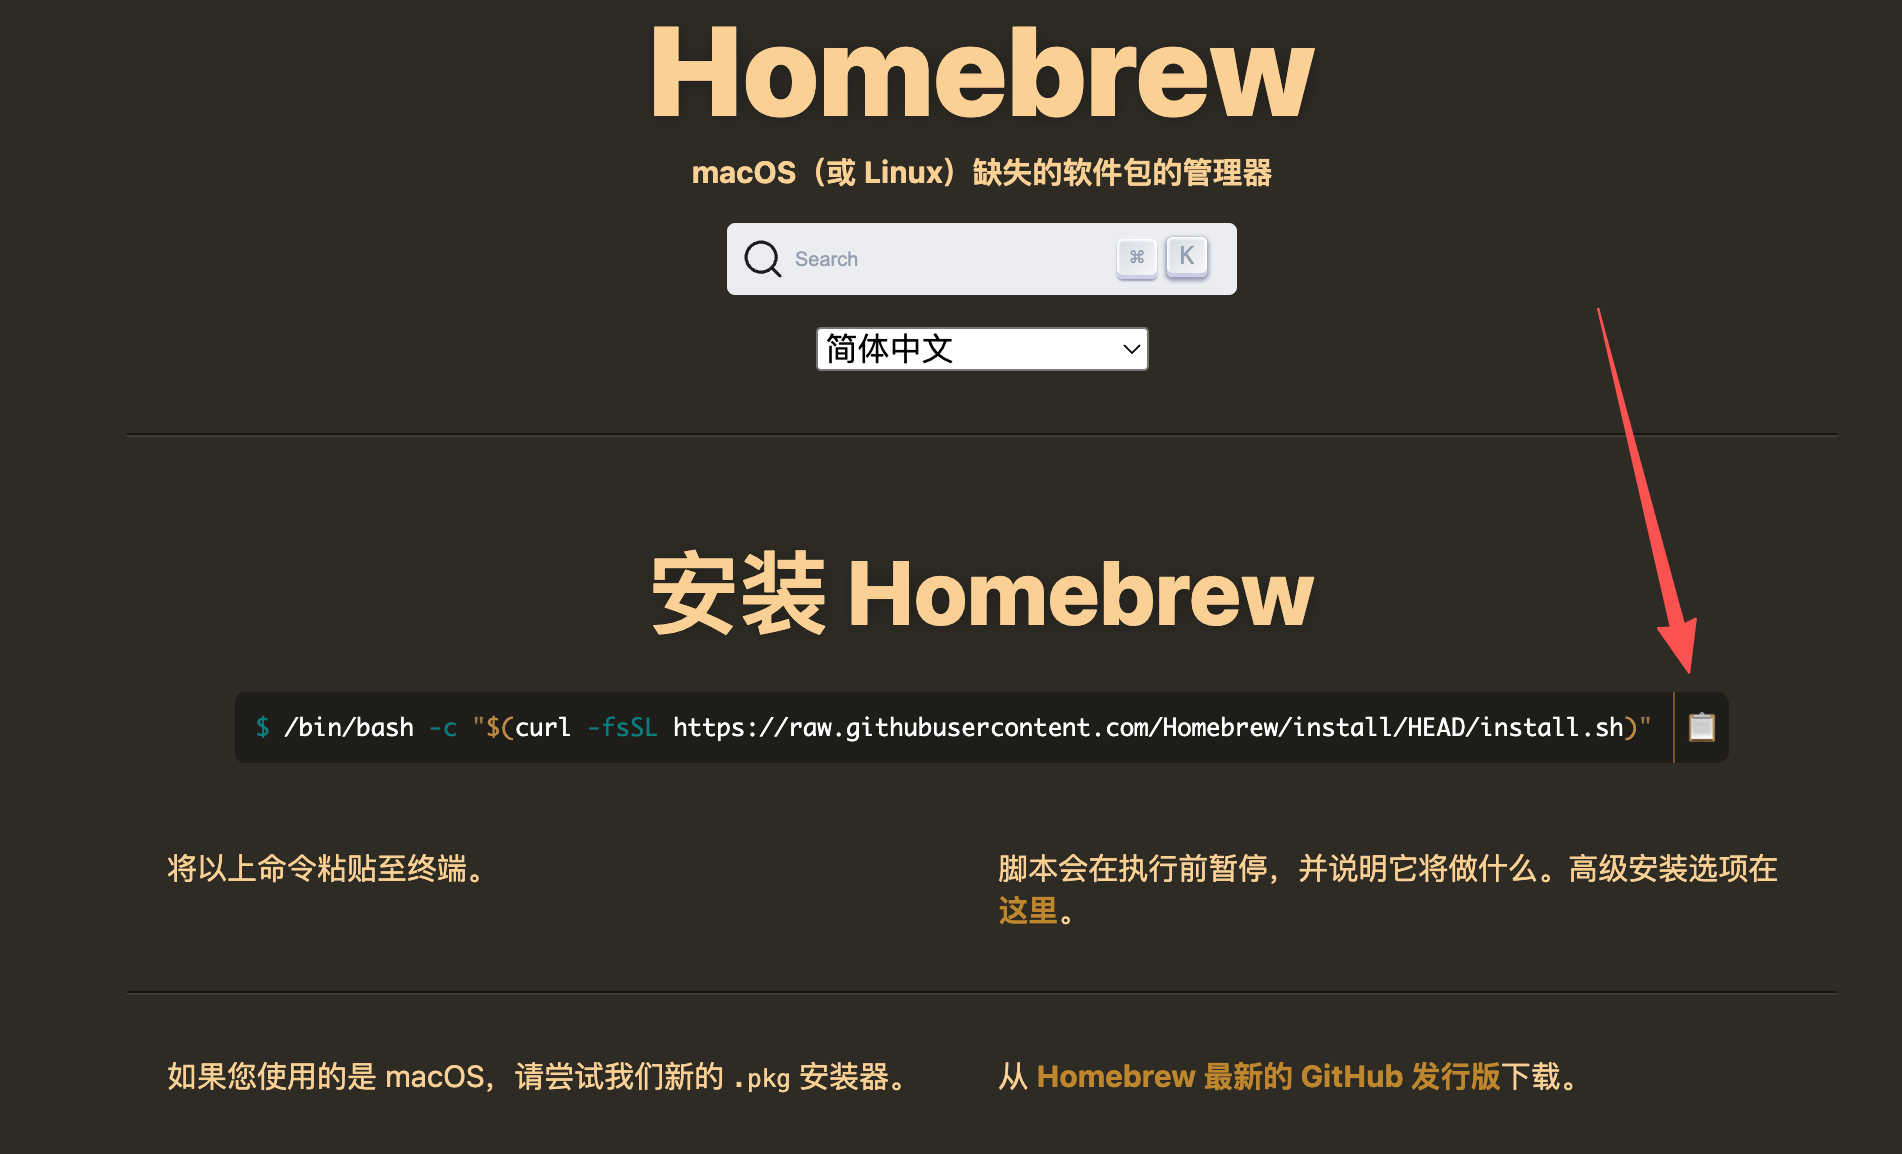
First, make sure you have Homebrew installed on your computer. If not, click the link and you’ll see a command that you can copy and run to install it in one step.
When installing Homebrew, some resources are hosted overseas, so you need to configure a TUN proxy.
After the installation is complete, use Homebrew to install Node.js (you can skip this step if it is already installed).
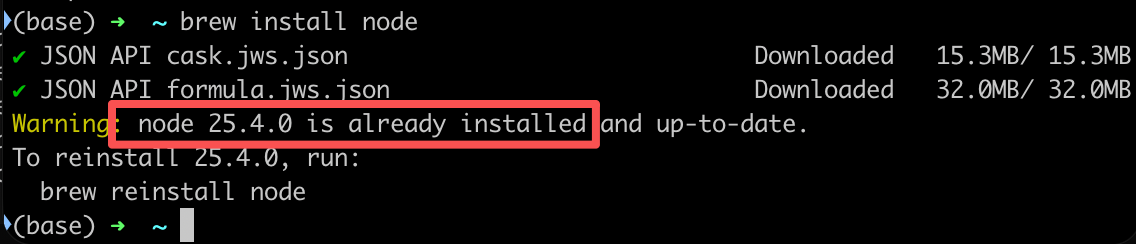
Use the following command to verify the installation. If you see the following message, it means Node has been installed successfully.
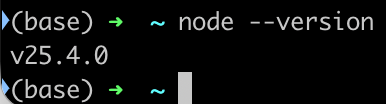
Note that the Nodejs version must be 18 or higher.
If your version is lower than this, you can ask the AI how to upgrade your Node.js version. First, have the AI give you commands to collect your system information, and then it will provide the fastest and most accurate guidance.
2. Install Claude Code CLI
Open a new terminal, then run the following command:

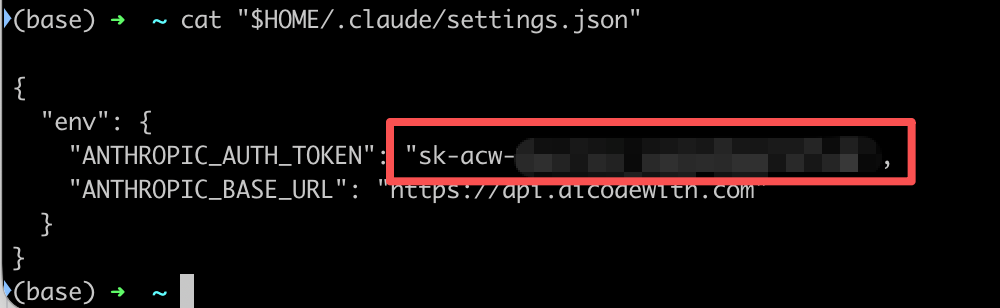
3. Create a configuration file
Open a new terminal, then run the following command:
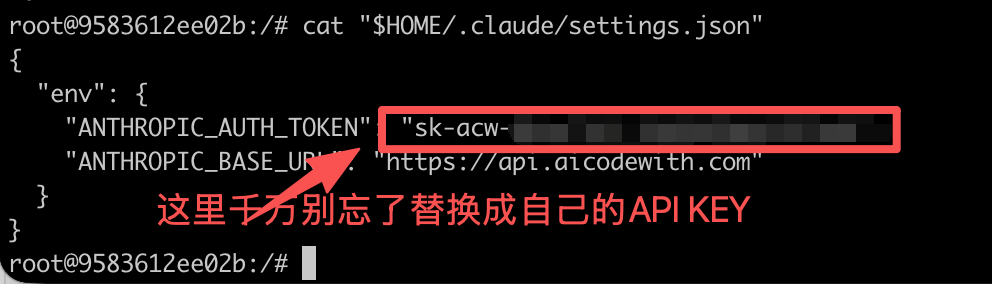
Use the following command to view the contents of the configuration file,Be sure not to forget to replace the API KEY!
4. Verify the installation
Reopen the terminal or IDE and run:
If you see the following prompt, select the first "yes" option and then press Enter.
This is asking you to authorize Claude Code to access and execute the code in the current folder so it can read, modify, and run project files.
Next, you can enter the following in the dialog box: Hello! If you receive a normal reply and there is a correct invocation record in the backend, it means the configuration was successful.
Linux
1. Install Node.js
Command to install Nodejs (you can skip this if it is already installed):
Verify installation:
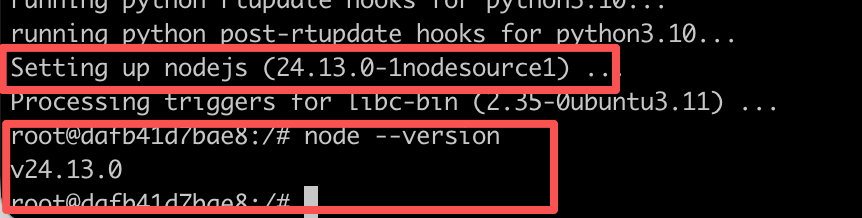
Note that the Nodejs version must be 18 or higher.
If your version is lower than this, you can ask the AI how to upgrade your Node.js version. First, have the AI give you commands to collect your system information, and then it will provide the fastest and most accurate guidance.
2. Install Claude Code CLI
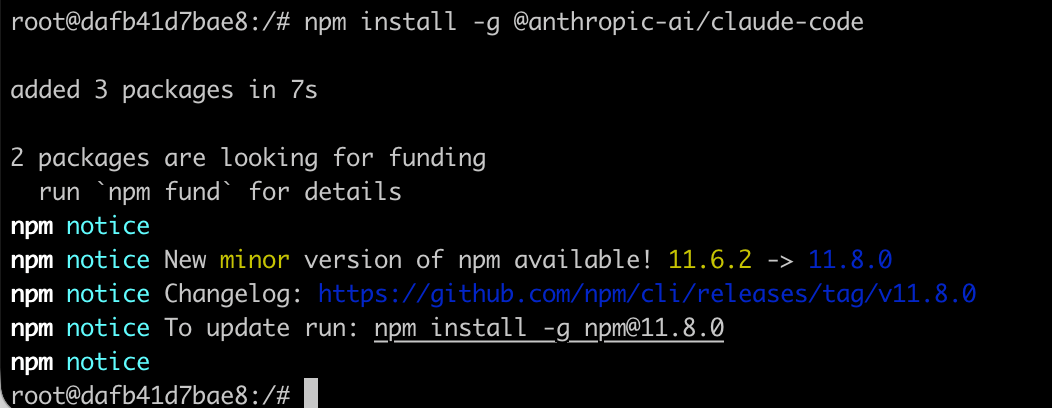
That last message is just saying my current npm version is relatively low. You probably won’t see it on your side, so you can just ignore it.
If you run into any other issues, you can ask the AI.
3. Create a configuration file
Open a new terminal, then run the following command:
Use the following command to view the contents of the configuration file,Be sure not to forget to replace the API KEY!
4. Verify the installation
Reopen the terminal or IDE and run:
If you see the following prompt, select the first "yes" and then press Enter.
This is asking you to authorize Claude Code to access and execute the code in the current folder, so it can read, modify, and run project files – common questions
Next, you can type hi in the dialog box. If you receive a normal reply and there is a correct invocation record in the backend, it means the configuration was successful.
FAQ
1. Unable to connect to the Anthropic service
Error screenshot
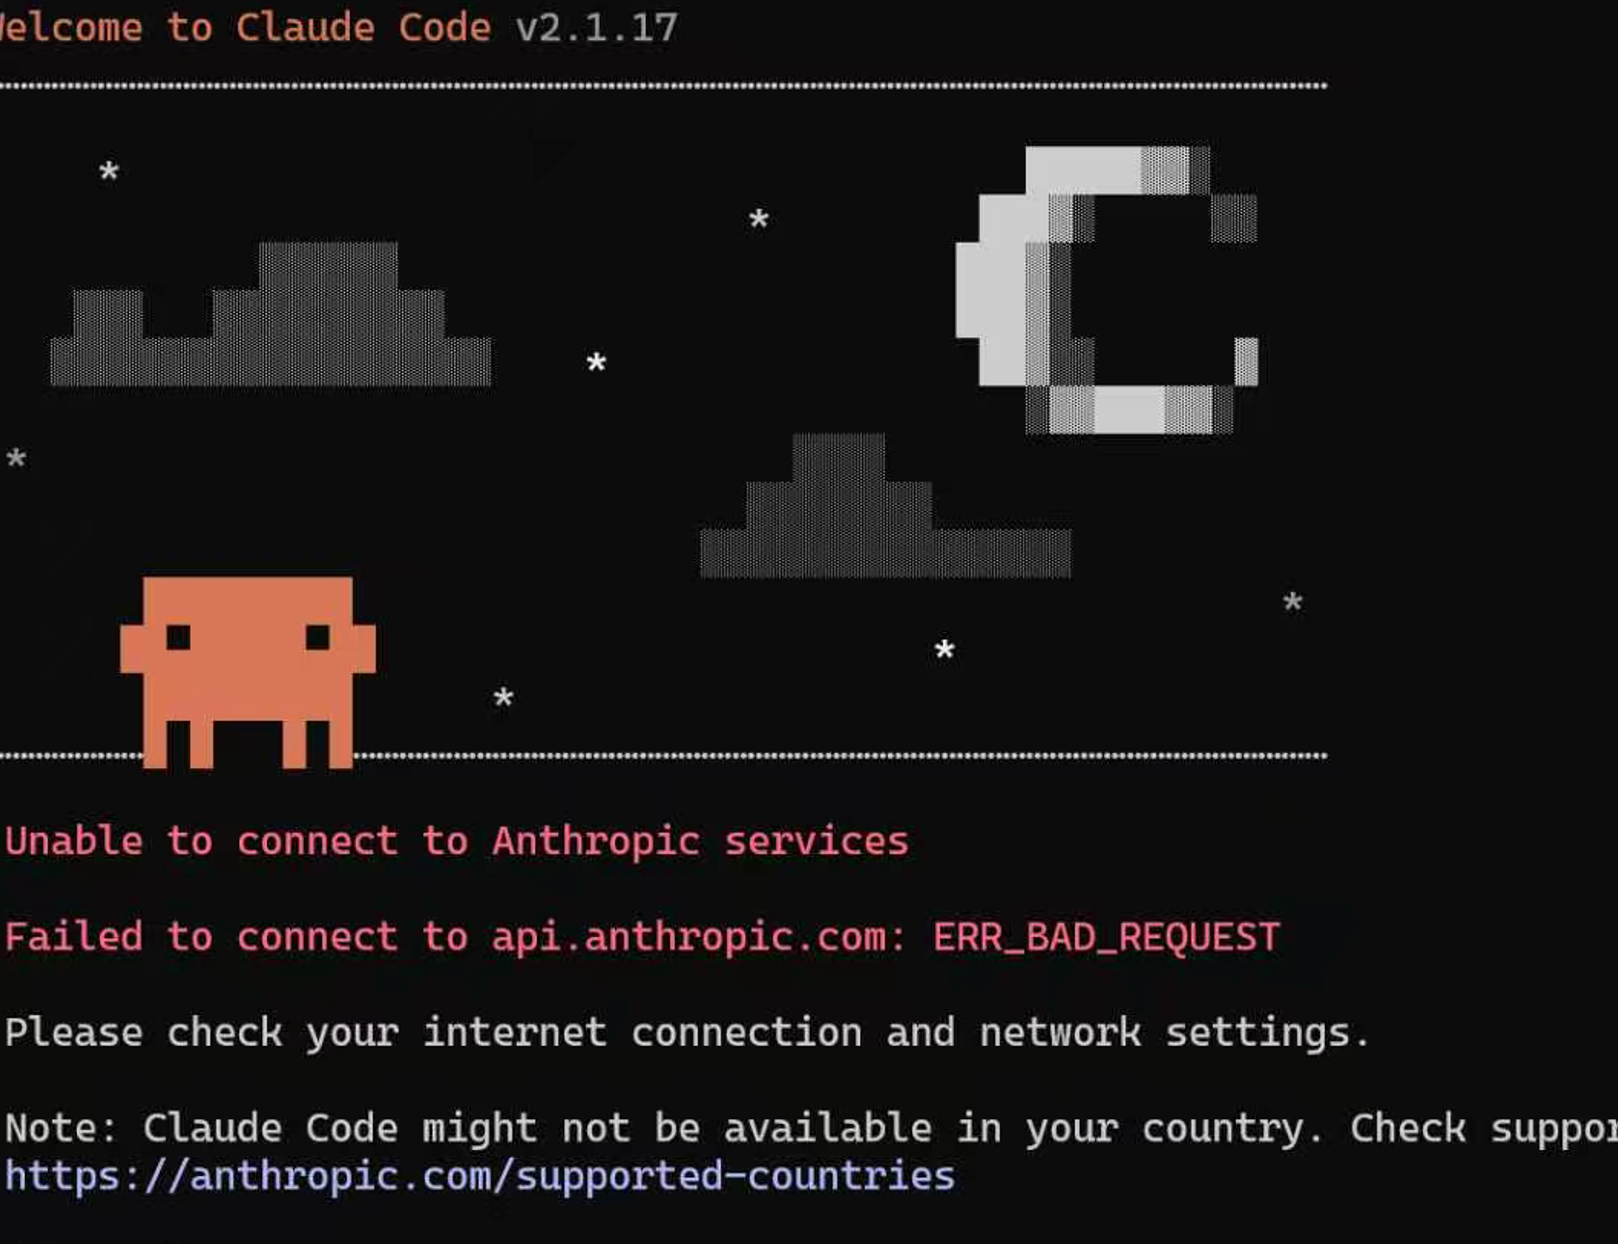
Solution
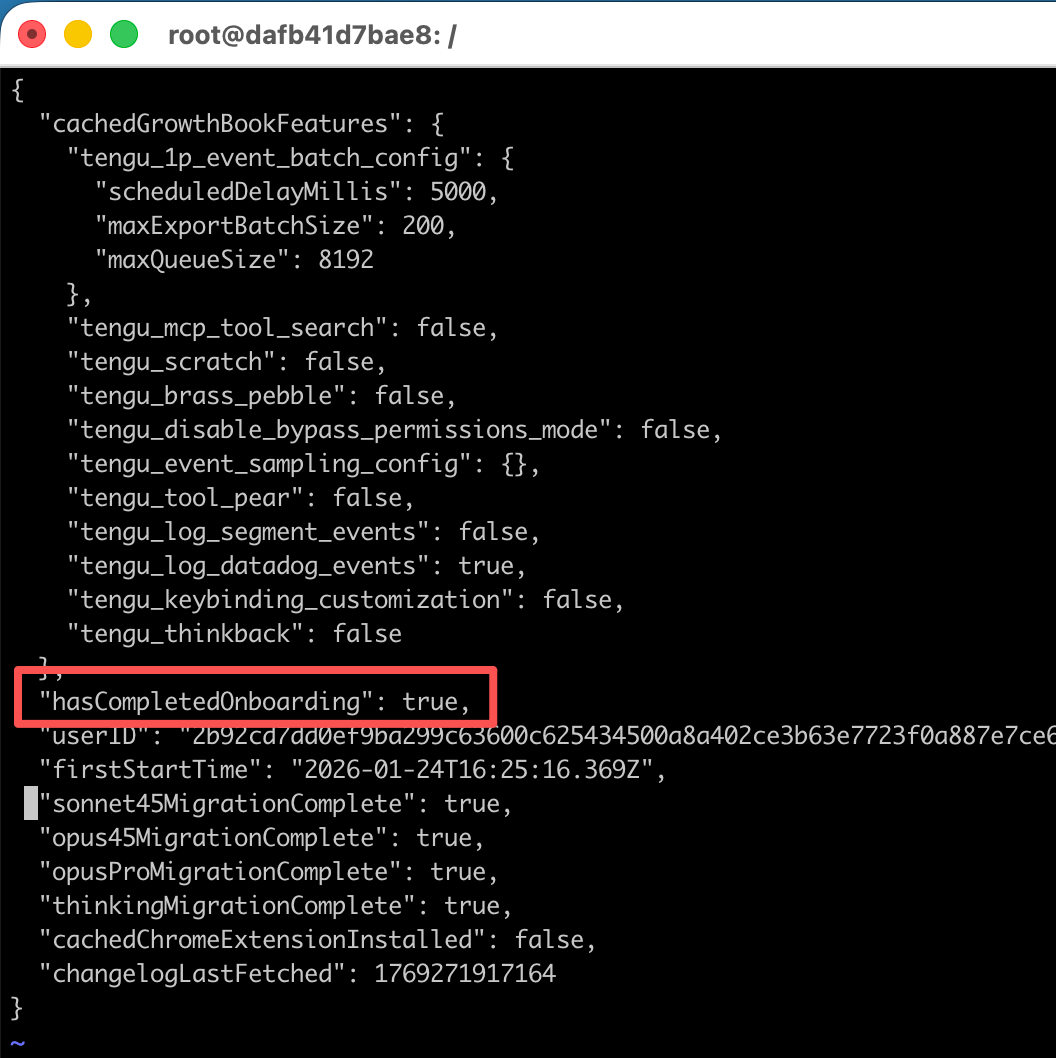
In the ~/.claude.json file, add the following line:"hasCompletedOnboarding": true,
Note that there is a comma at the end of this line; just add it in the middle of the JSON, as shown below.
2. Invalid API key · Please run /login
Error screenshot
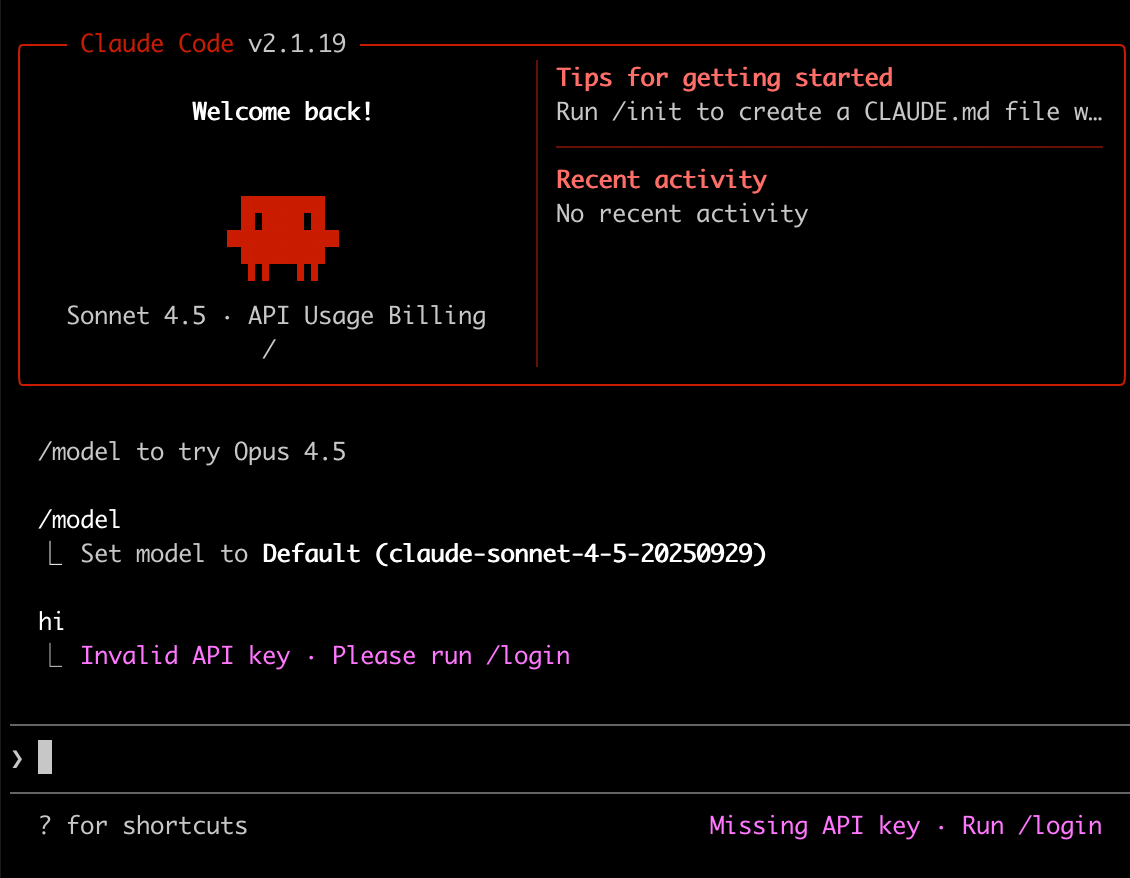
Solution
This issue occurs because the environment variables are not configured correctly. You can refer to the earlier tutorial and reconfigure the environment variables.
Mainly these two
ANTHROPIC_BASE_URL and ANTHROPIC_AUTH_TOKEN
3. 401 {"error":"Invalid API key"}
Error screenshot
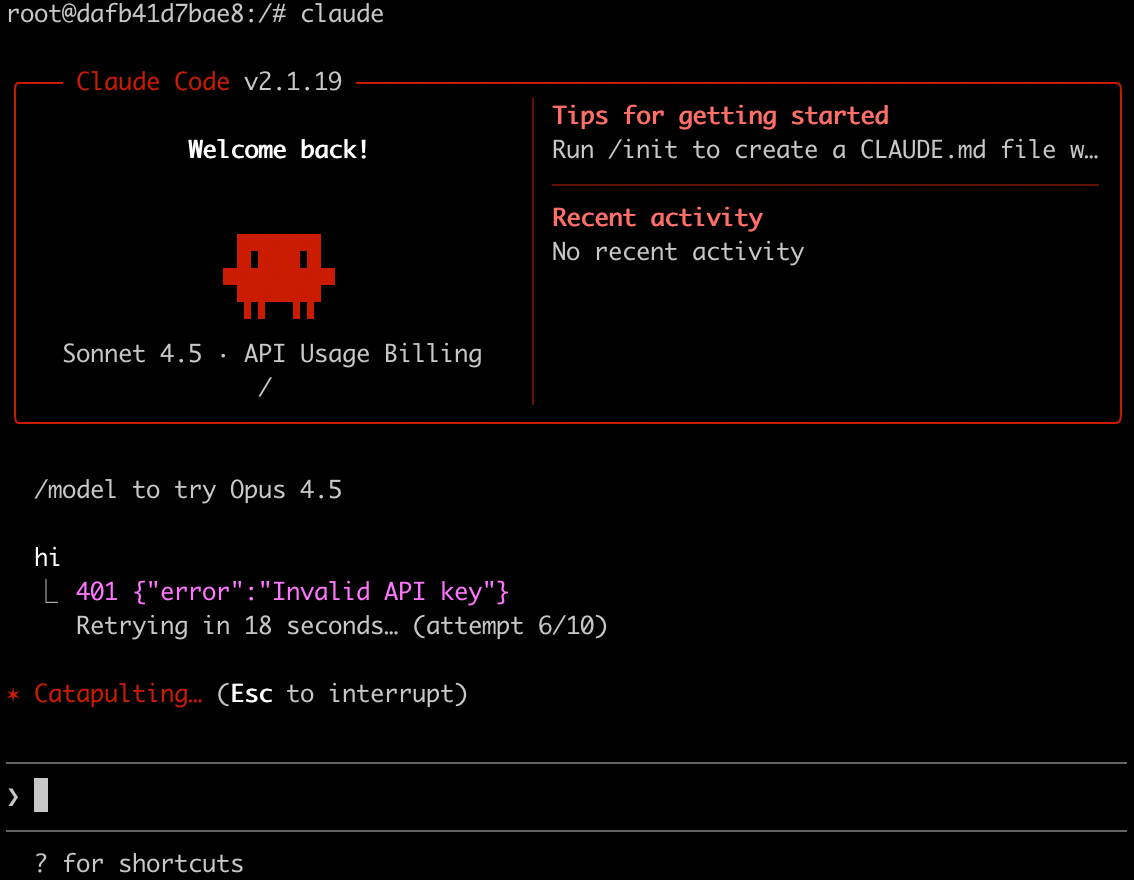
Solution
This issue occurs because the key was set incorrectly. You can go to the website to generate a new key, then follow the earlier tutorial to reset the environment variable ANTHROPIC_AUTH_TOKEN environment variable.