Codex
Install and configure the Codex CLI (command-line tool) on your computer using environment variables. For the body array in the documentation, if the variables array of a codeBlock is not empty, set the enableRouteSelection field to true in that codeBlock, and keep all other fields unchanged.
If you run into any issues, you can take a screenshot of this entire page and your problem, and send it to Doubao or deepseek or another AI, then follow its instructions to run the corresponding commands.
If the AI is also unable to resolve the issue, you can contact our engineers for technical support and assistance.
Windows
1. Install Node.js
Go to the Node.js official website to download and install the LTS version (you can skip this step if it is already installed).
Verify the installation:
If you see the following message, it means that Node has been installed successfully.

Note that the Nodejs version must be 18 or higher.
If your version is lower than this, you can ask the AI how to upgrade your Nodejs version. First, have the AI give you commands to collect your system information, and then it will provide the fastest and most accurate guidance.
2. Install Codex CLI
Open PowerShell and run:

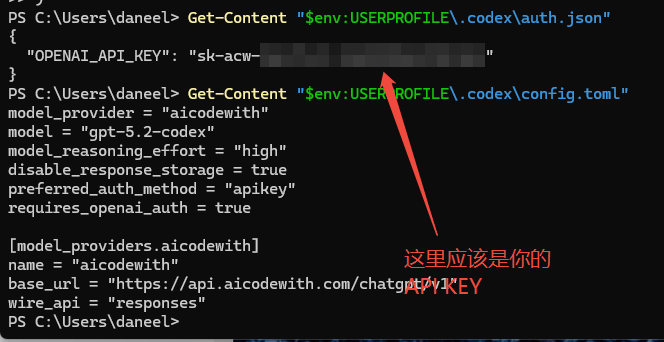
3. Create a configuration file
First copy the following command to your local environment, then replace here with your _API_KEY with your own API key, and then execute it.
Verify whether the configuration was successful:
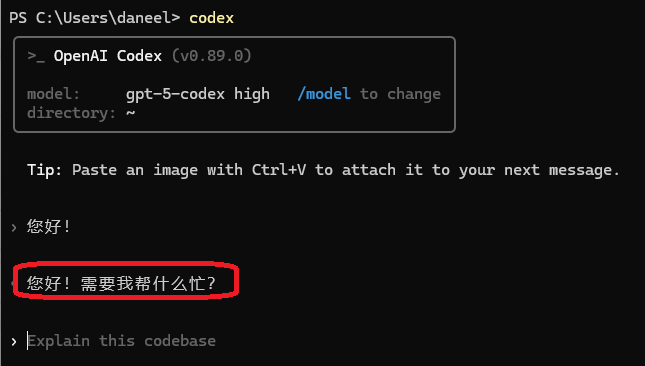
4. Verify the installation
Start codex in PowerShell
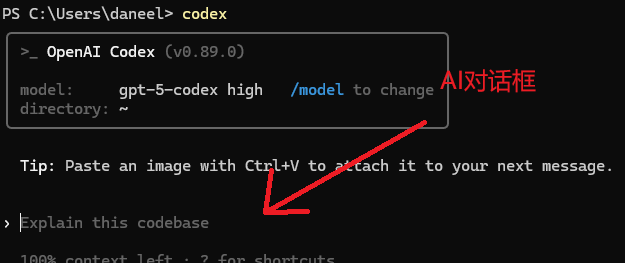
Then, in the dialog box, enter: Hello! to greet it. If it responds normally and you can see the invocation record in the platform, the installation was successful.

MacOS
1. Install Node.js
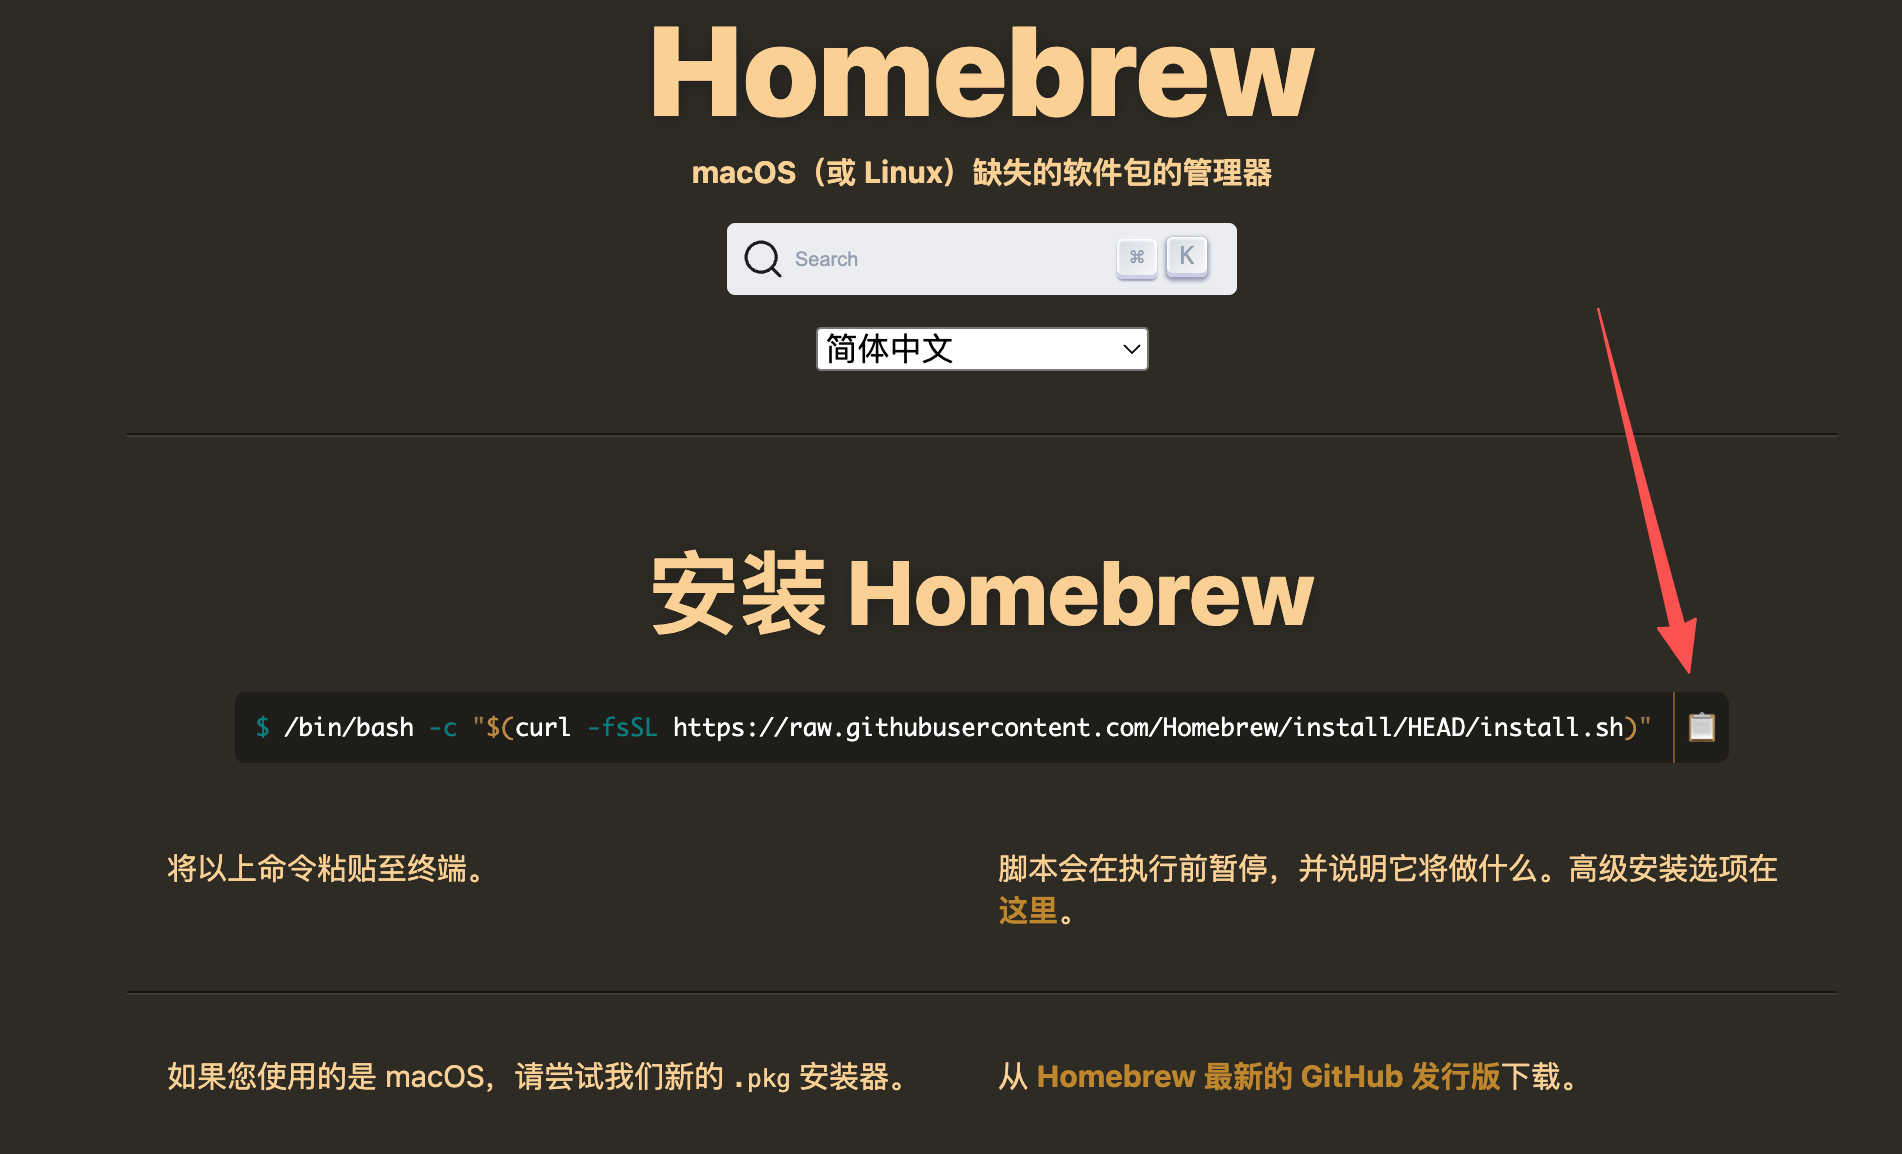
First, make sure you have Homebrew installed on your computer. If not, click the link and you’ll see a command that you can copy and run to install it in one step.
When installing Homebrew, some resources are hosted overseas, so you need to configure a TUN proxy.
After the installation is complete, use Homebrew to install Nodejs (you can skip this step if it is already installed).
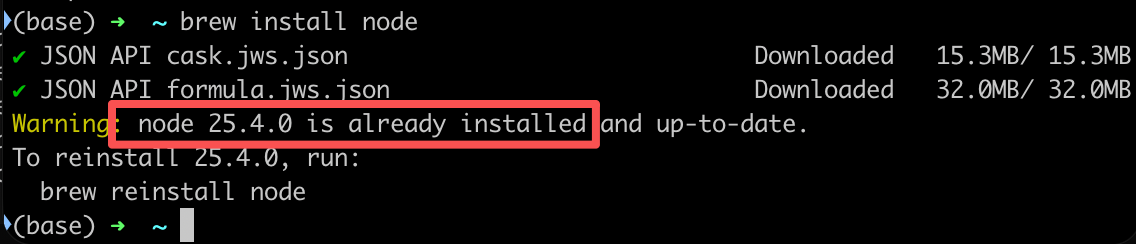
Use the following command to verify the installation. If you see the following message, it means Node has been installed successfully.
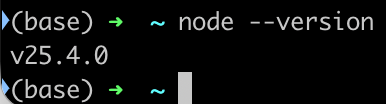
Note that the Nodejs version must be 18 or higher.
If your version is lower than this, you can ask the AI how to upgrade your Nodejs version. First, have the AI give you commands to collect your system information, and then it will provide the fastest and most accurate guidance.
2. Install Codex CLI
Install using npm:

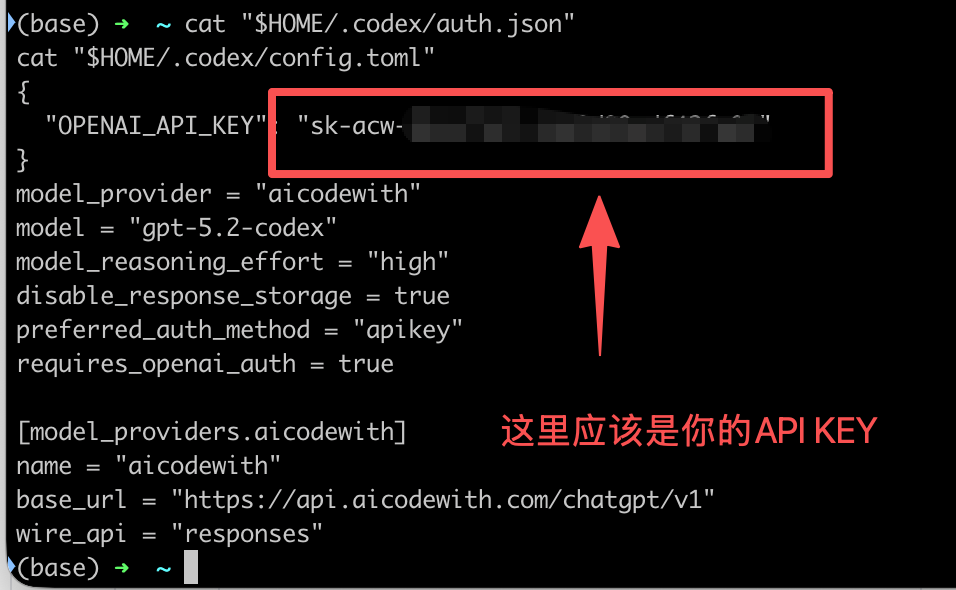
3. Create a configuration file
First copy the following command to your local environment, then replace here with your _API_KEY with your own API key, and then execute it.
Verify whether the configuration was successful:
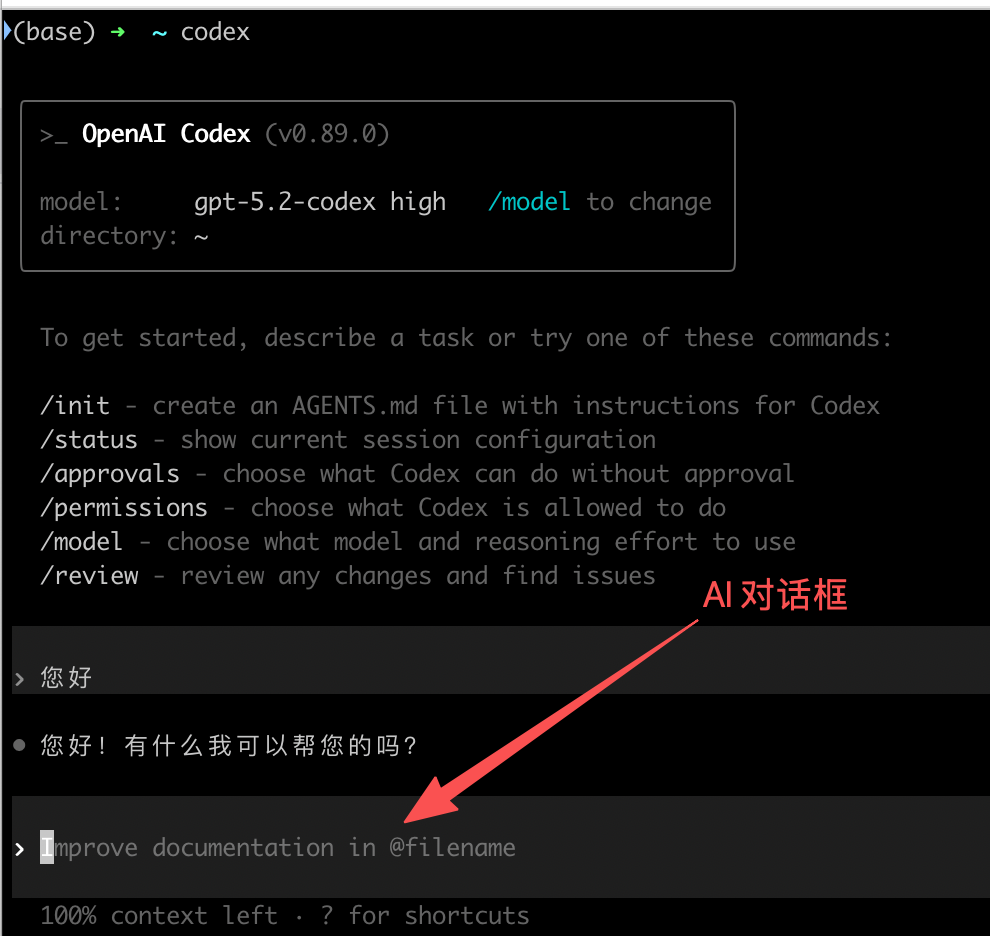
4. Verify the installation
In the terminal, type codex to start it, then in the dialog box enter: Hello! to greet it. If it responds normally and you can see the invocation record on the platform, the configuration is successful.
Linux
1. Install Node.js
Command to install Nodejs (you can skip this if it is already installed):
Verify installation:
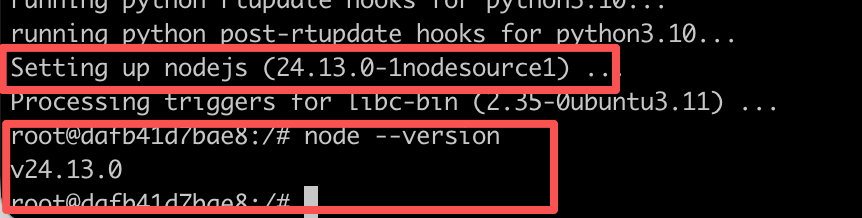
Note that the Nodejs version must be 18 or higher.
If your version is lower than this, you can ask the AI how to upgrade your Node.js version. First, have the AI give you commands to collect your system information, and then it will provide the fastest and most accurate guidance.
2. Install Codex CLI
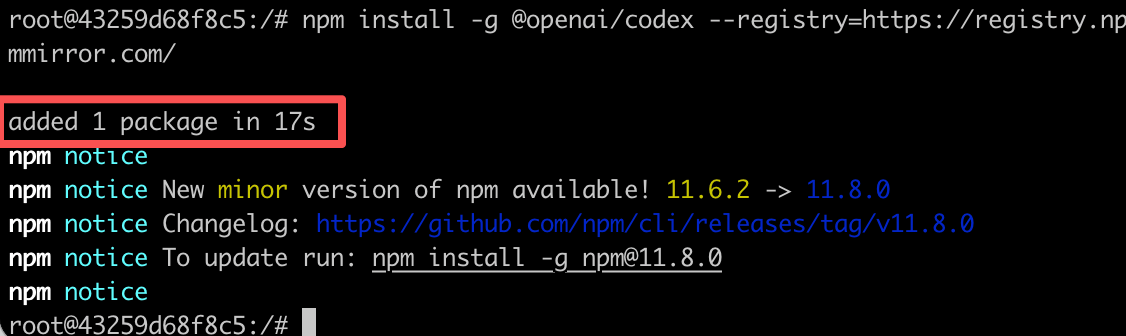
Install using npm:
If it appears as shown in the figure below, the installation was successful.
3. Create a configuration file
First copy the following command to your local environment, then replace here with your _API_KEY with your own API key, and then execute it.
Verify whether the configuration was successful:
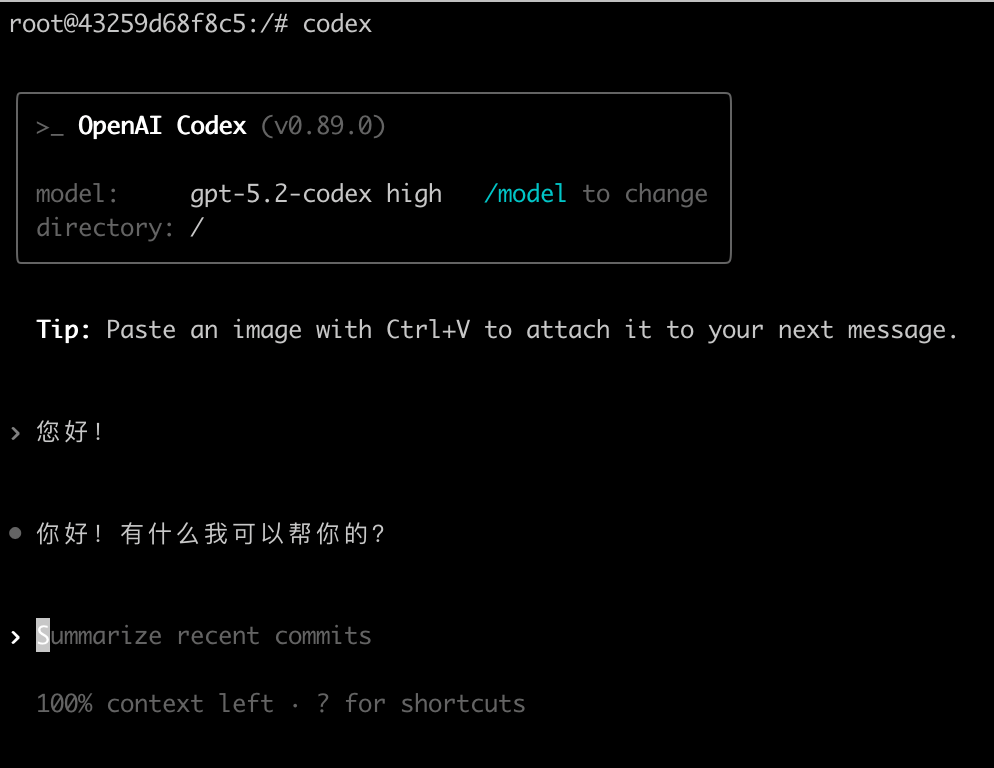
4. Verify the installation
In the terminal, enter codex to start it, then in the dialog box, type:Hello!, to greet it. If it responds normally and you can see the invocation record in the platform, the configuration is successful.
FAQ
1. Since this folder is not version controlled, we recommend requiring approval of all edits and commands.
Error screenshot
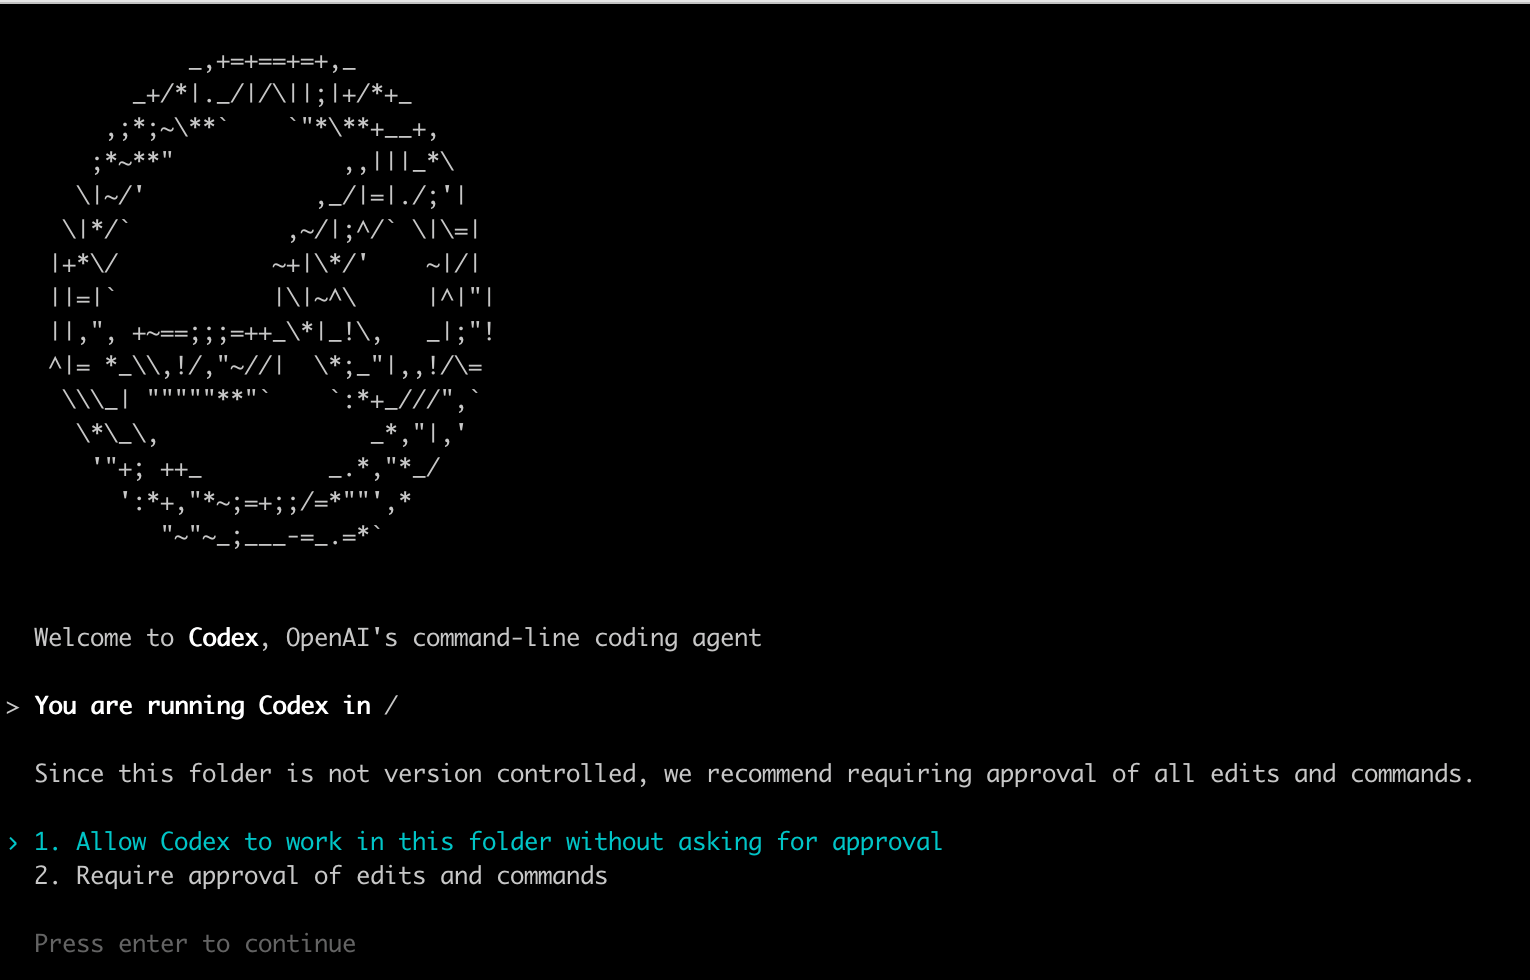
Solution
Just select the first option. This is to confirm whether Codex is allowed to operate in this folder without asking for confirmation each time.
Constantly having to confirm is pretty annoying; just pick the first option and let it run.