AI Code With

Hermes

Hermes Agent 是 Nous Research 开发的可扩展 AI 智能体,能通过工具、技能和自动化工作流帮你完成编码、研究、文件操作、日程任务等实际工作,支持本地终端、微信等多种接入方式。

Hermes

MacOS / Linux

系统要求

macOS 10.15+ 或主流 Linux 发行版

1.安装Hermes

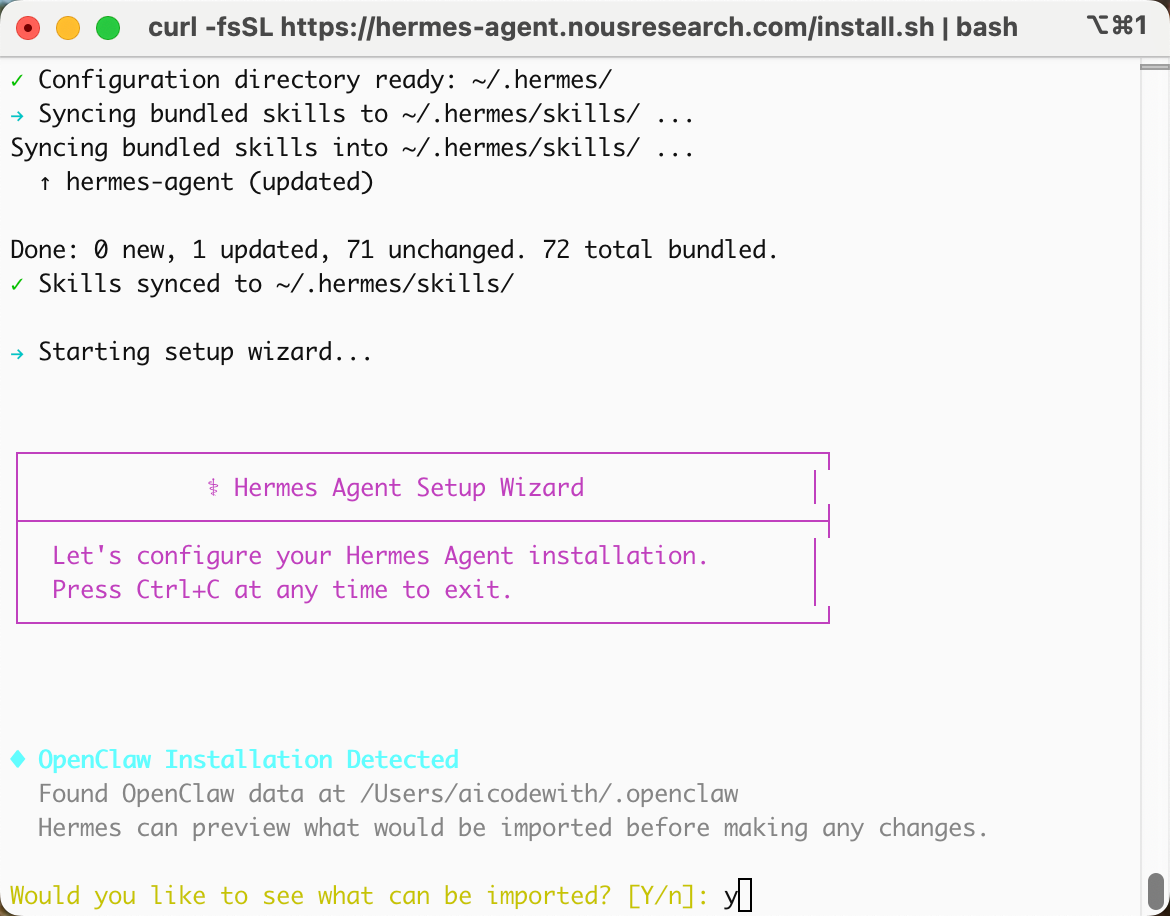
1.打开终端,粘贴下面命令,回车

bash
1curl -fsSL https://hermes-agent.nousresearch.com/install.sh | bash

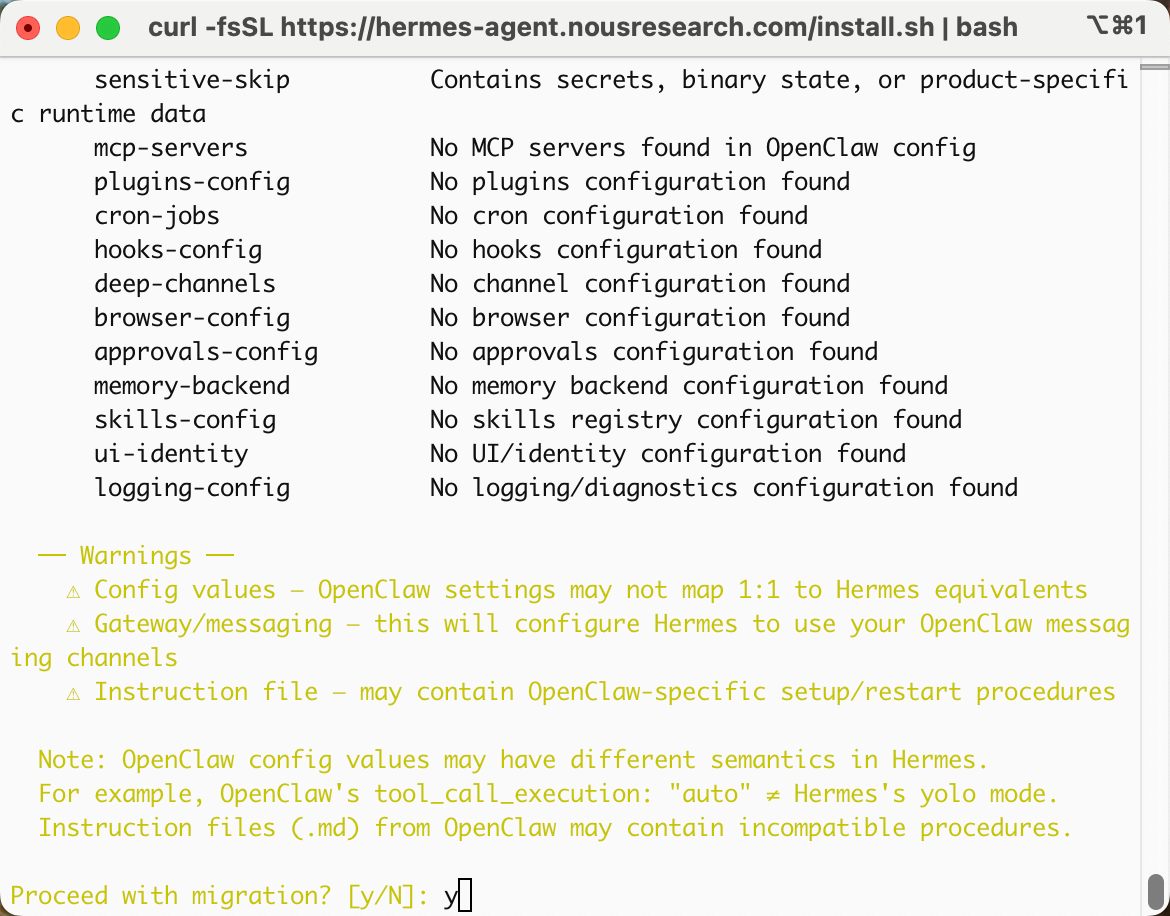
2.都输入 y 并回车即可

9b4defab14b3fae5d2ee05804a2beceb
7eeaed33f4f7b72ff2a8329a7a5e762e

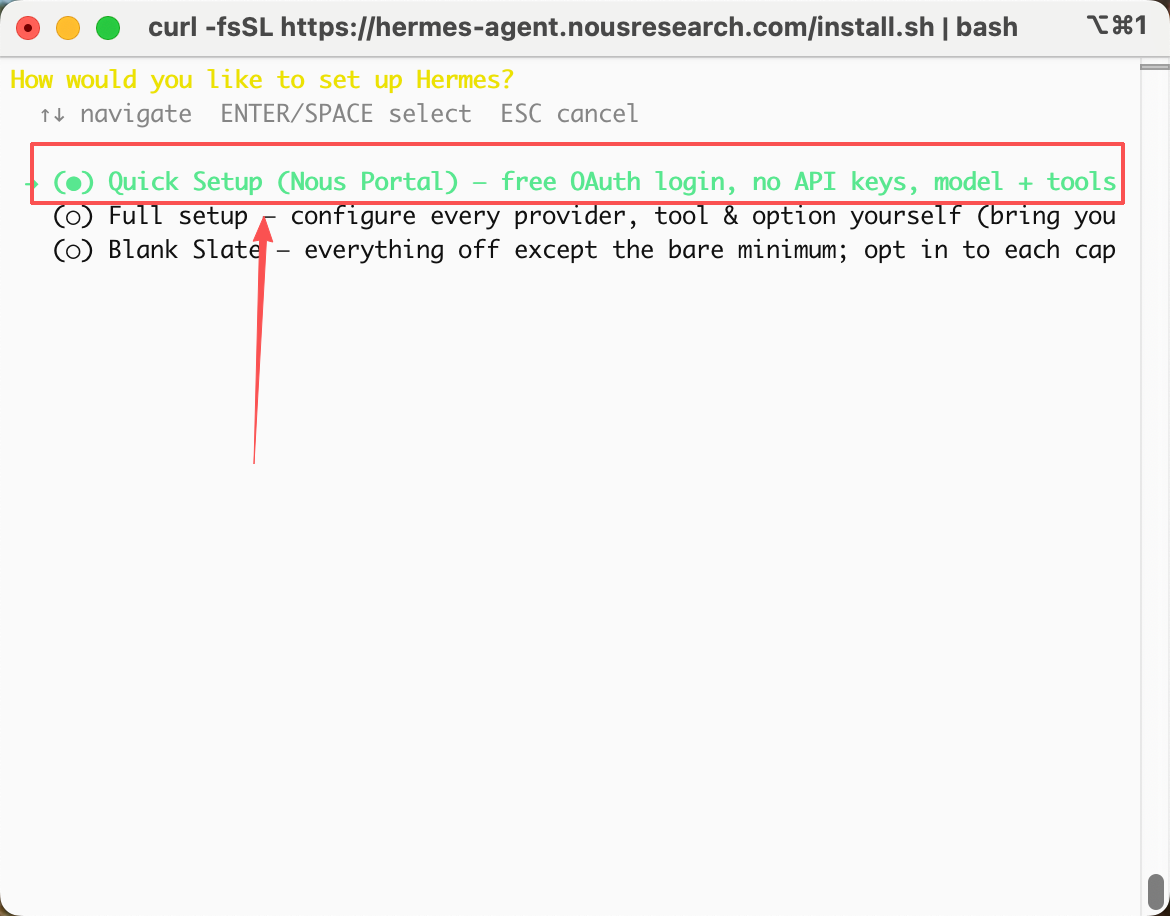
3.选择“快速设置(Quick Setup)”,选择“跳过信息平台设置”(Skip-set up later)
image
image

4.安装完成后,执行下面这条让 hermes 在当前终端立即可用

bash
1source $HOME/.local/bin/env

重新打开终端后就不用再执行 source 了,因为安装脚本已经把路径写进了你的 shell 配置。

2.配置

1.点击复制下面命令,弹窗处填写您创建的API key,然后复制代码到终端回车执行

bash
1mkdir -p ~/.hermes && cat > ~/.hermes/config.yaml << 'EOF'
2model:
3 default: claude-opus-4-8
4 provider: aicodewith-claude
5custom_providers:
6- name: aicodewith-claude
7 base_url: https://api.aicodewith.com
8 api_key: 在这里替换成你的_API_KEY
9 api_mode: anthropic_messages
10- name: aicodewith-openai
11 base_url: https://api.aicodewith.com/v1
12 api_key: 在这里替换成你的_API_KEY
13 api_mode: chat_completions
14- name: aicodewith-gemini
15 base_url: https://api.aicodewith.com/gemini_cli/v1beta
16 api_key: 在这里替换成你的_API_KEY
17 api_mode: chat_completions
18EOF

3.验证

1.终端粘贴下面命令,回车

bash
1hermes

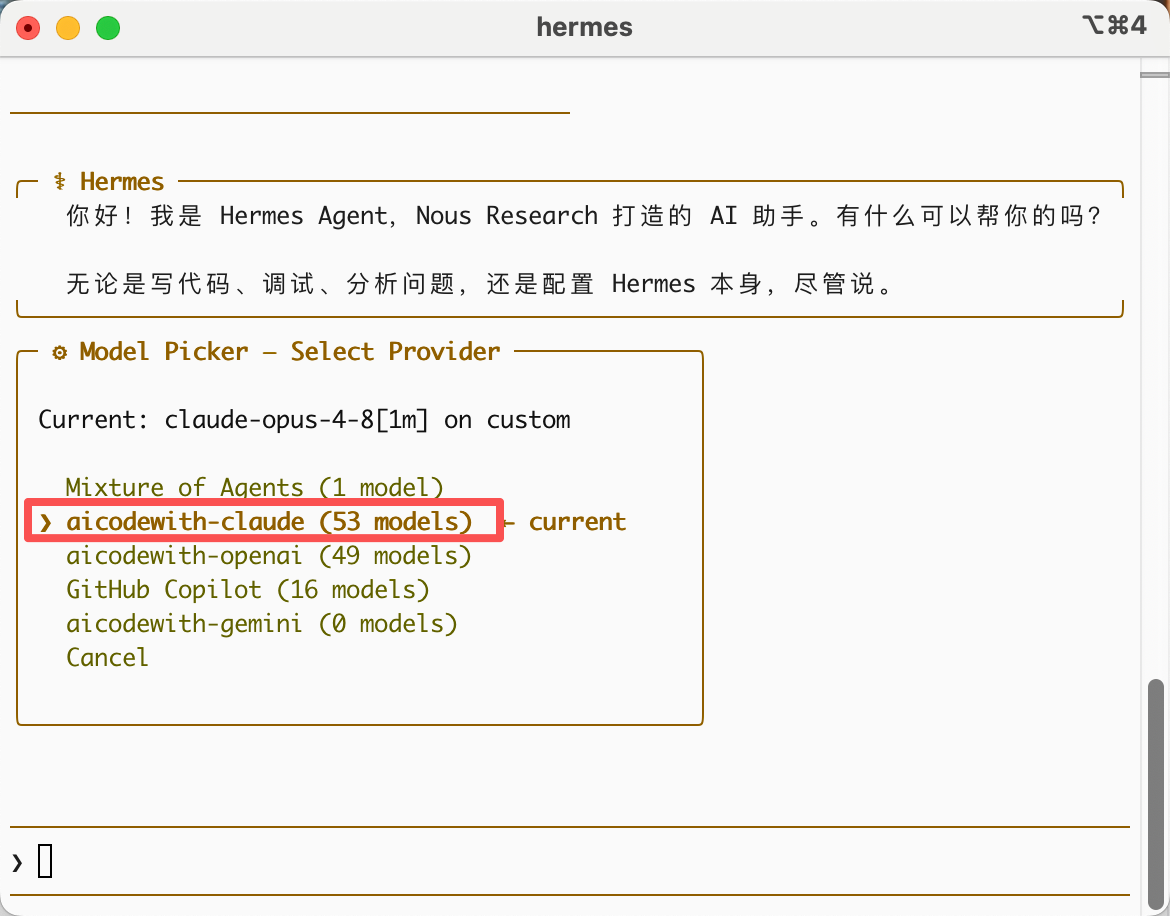
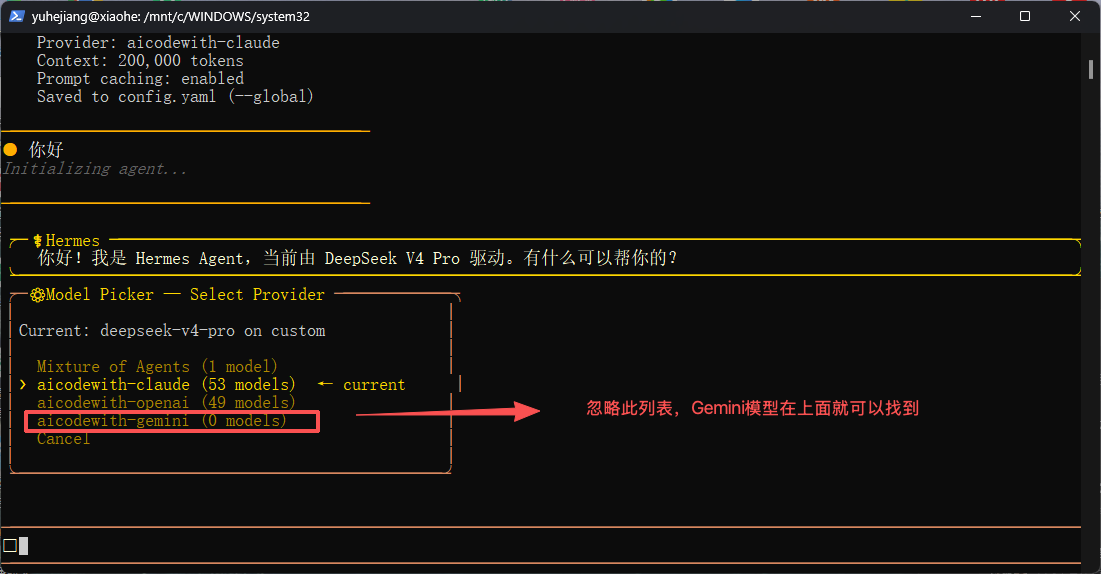
2./model 选择以aicodewith开头的模型

image

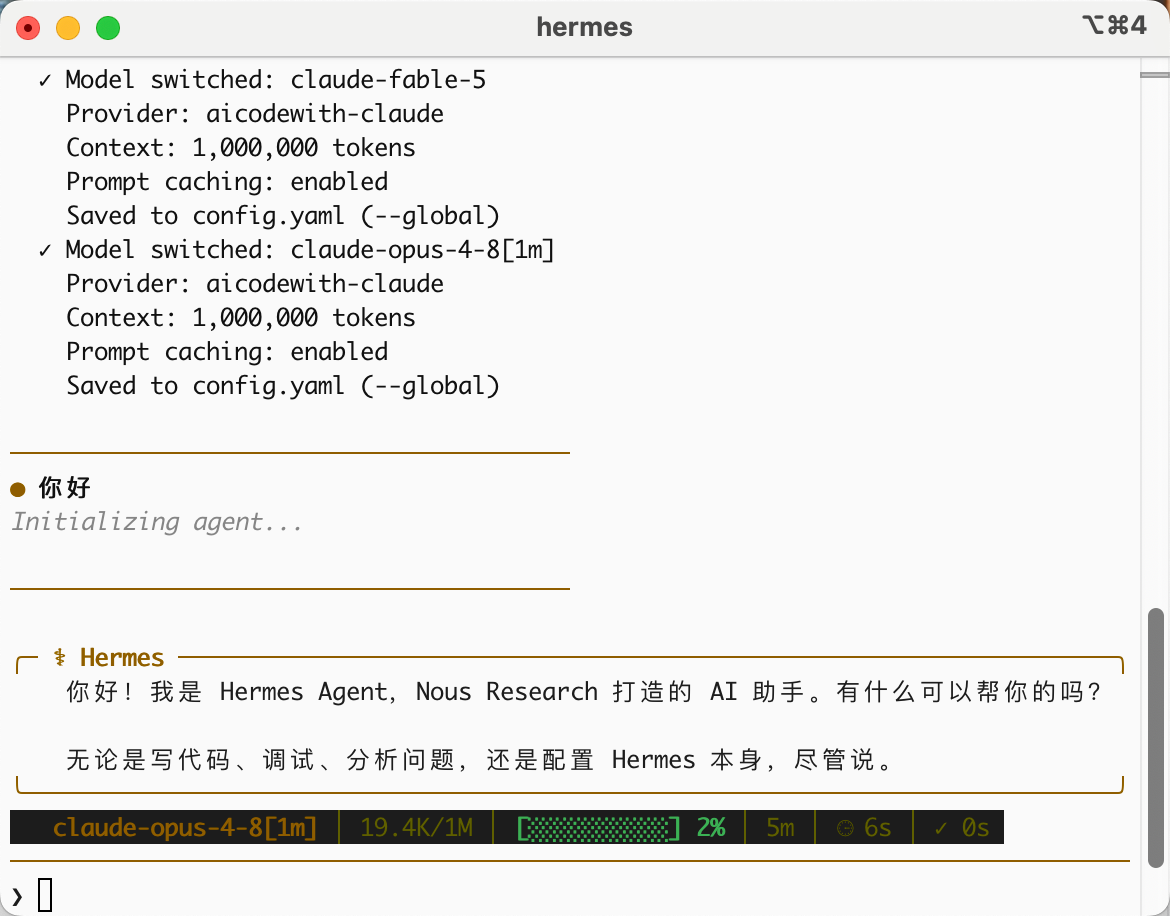
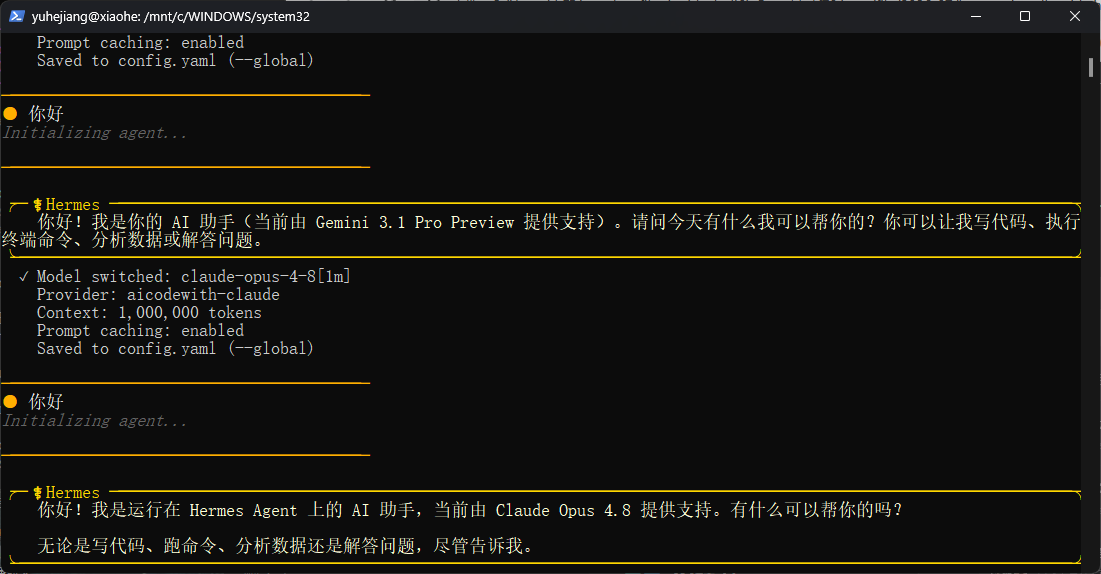
3.测试对话,有正常回复即为安装成功啦

image
常用命令/model(查看和切换模型)↑ / ↓(浏览历史命令)Esc(撤回 / 退出)/help(列出所有可用命令)

Windows

系统要求

Windows 10/11 + WSL2 + Ubuntu 22.04

1.装WSL(已装的跳过)

安装完成后电脑会要求重启。重启后会自动弹出 Ubuntu 窗口,设置一个用户名和密码即可。
如果之前已经装过 WSL 且能正常打开 Ubuntu 终端,直接跳到【安装Hermes】

1.打开 PowerShell(建议以管理员身份运行)并执行

bash
1wsl --install
2wsl --list --online
3wsl --install -d Ubuntu-22.04
4wsl.exe --install

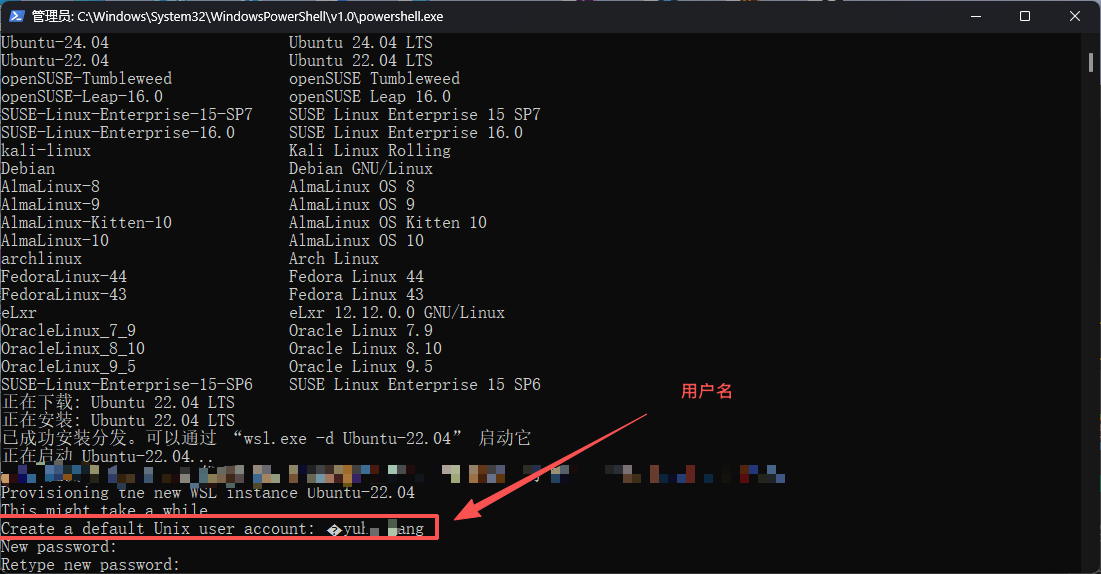
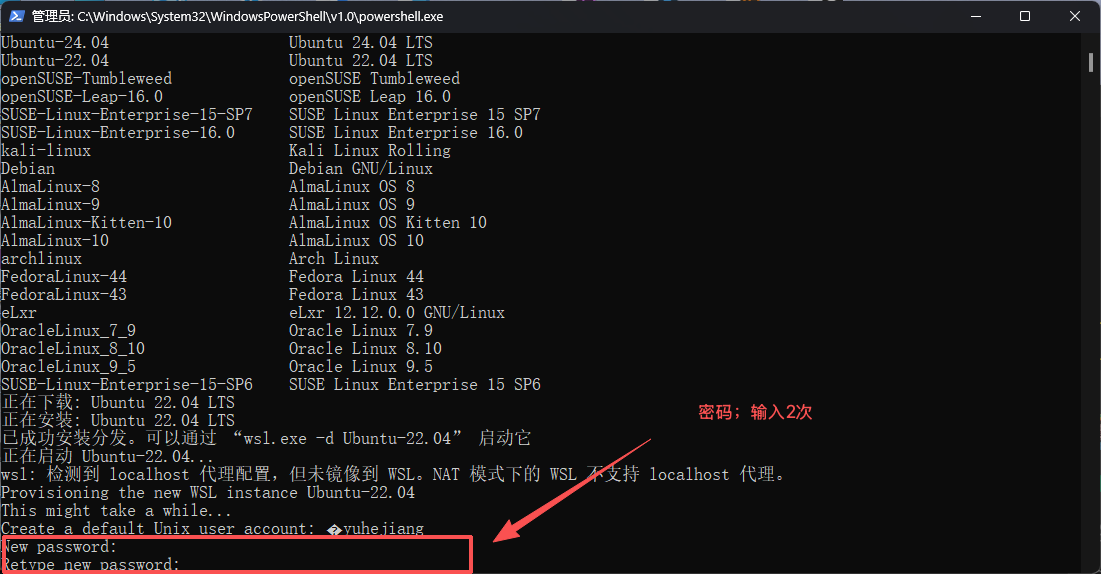
2.设置您的用户名和密码

image
image

遇到[Y/n/e],都输入y,并回车

2.安装Hermes

1.打开 WSL 终端(搜索 Ubuntu 或在 PowerShell 输入 wsl),粘贴下面命令

bash
1curl -fsSL https://hermes-agent.nousresearch.com/install.sh | bash

遇到[Y/n/e],输入y,并回车
遇到Password,输入您一开始创建的密码,并回车

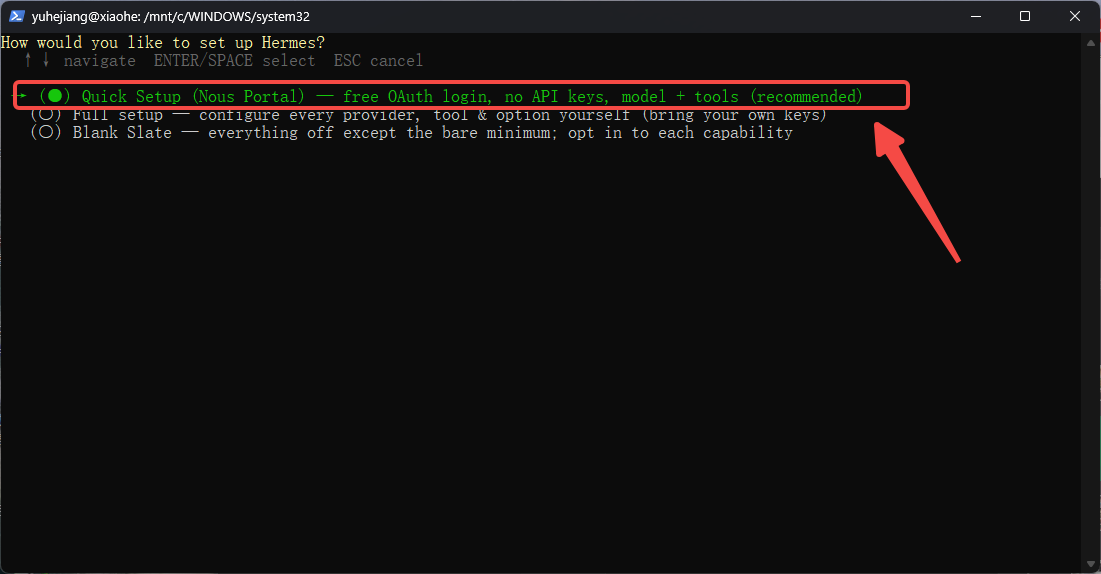
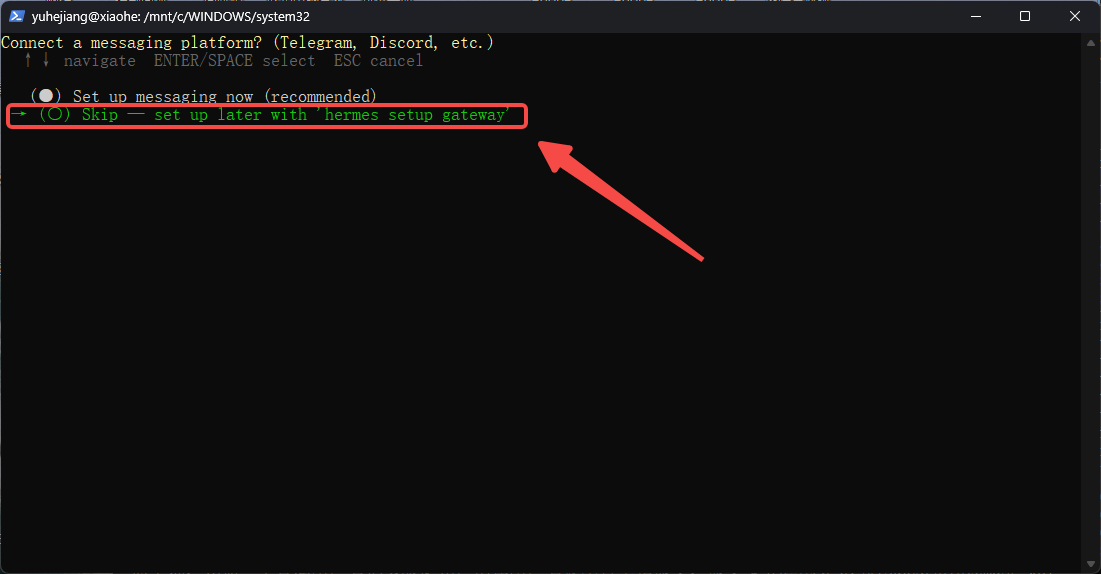
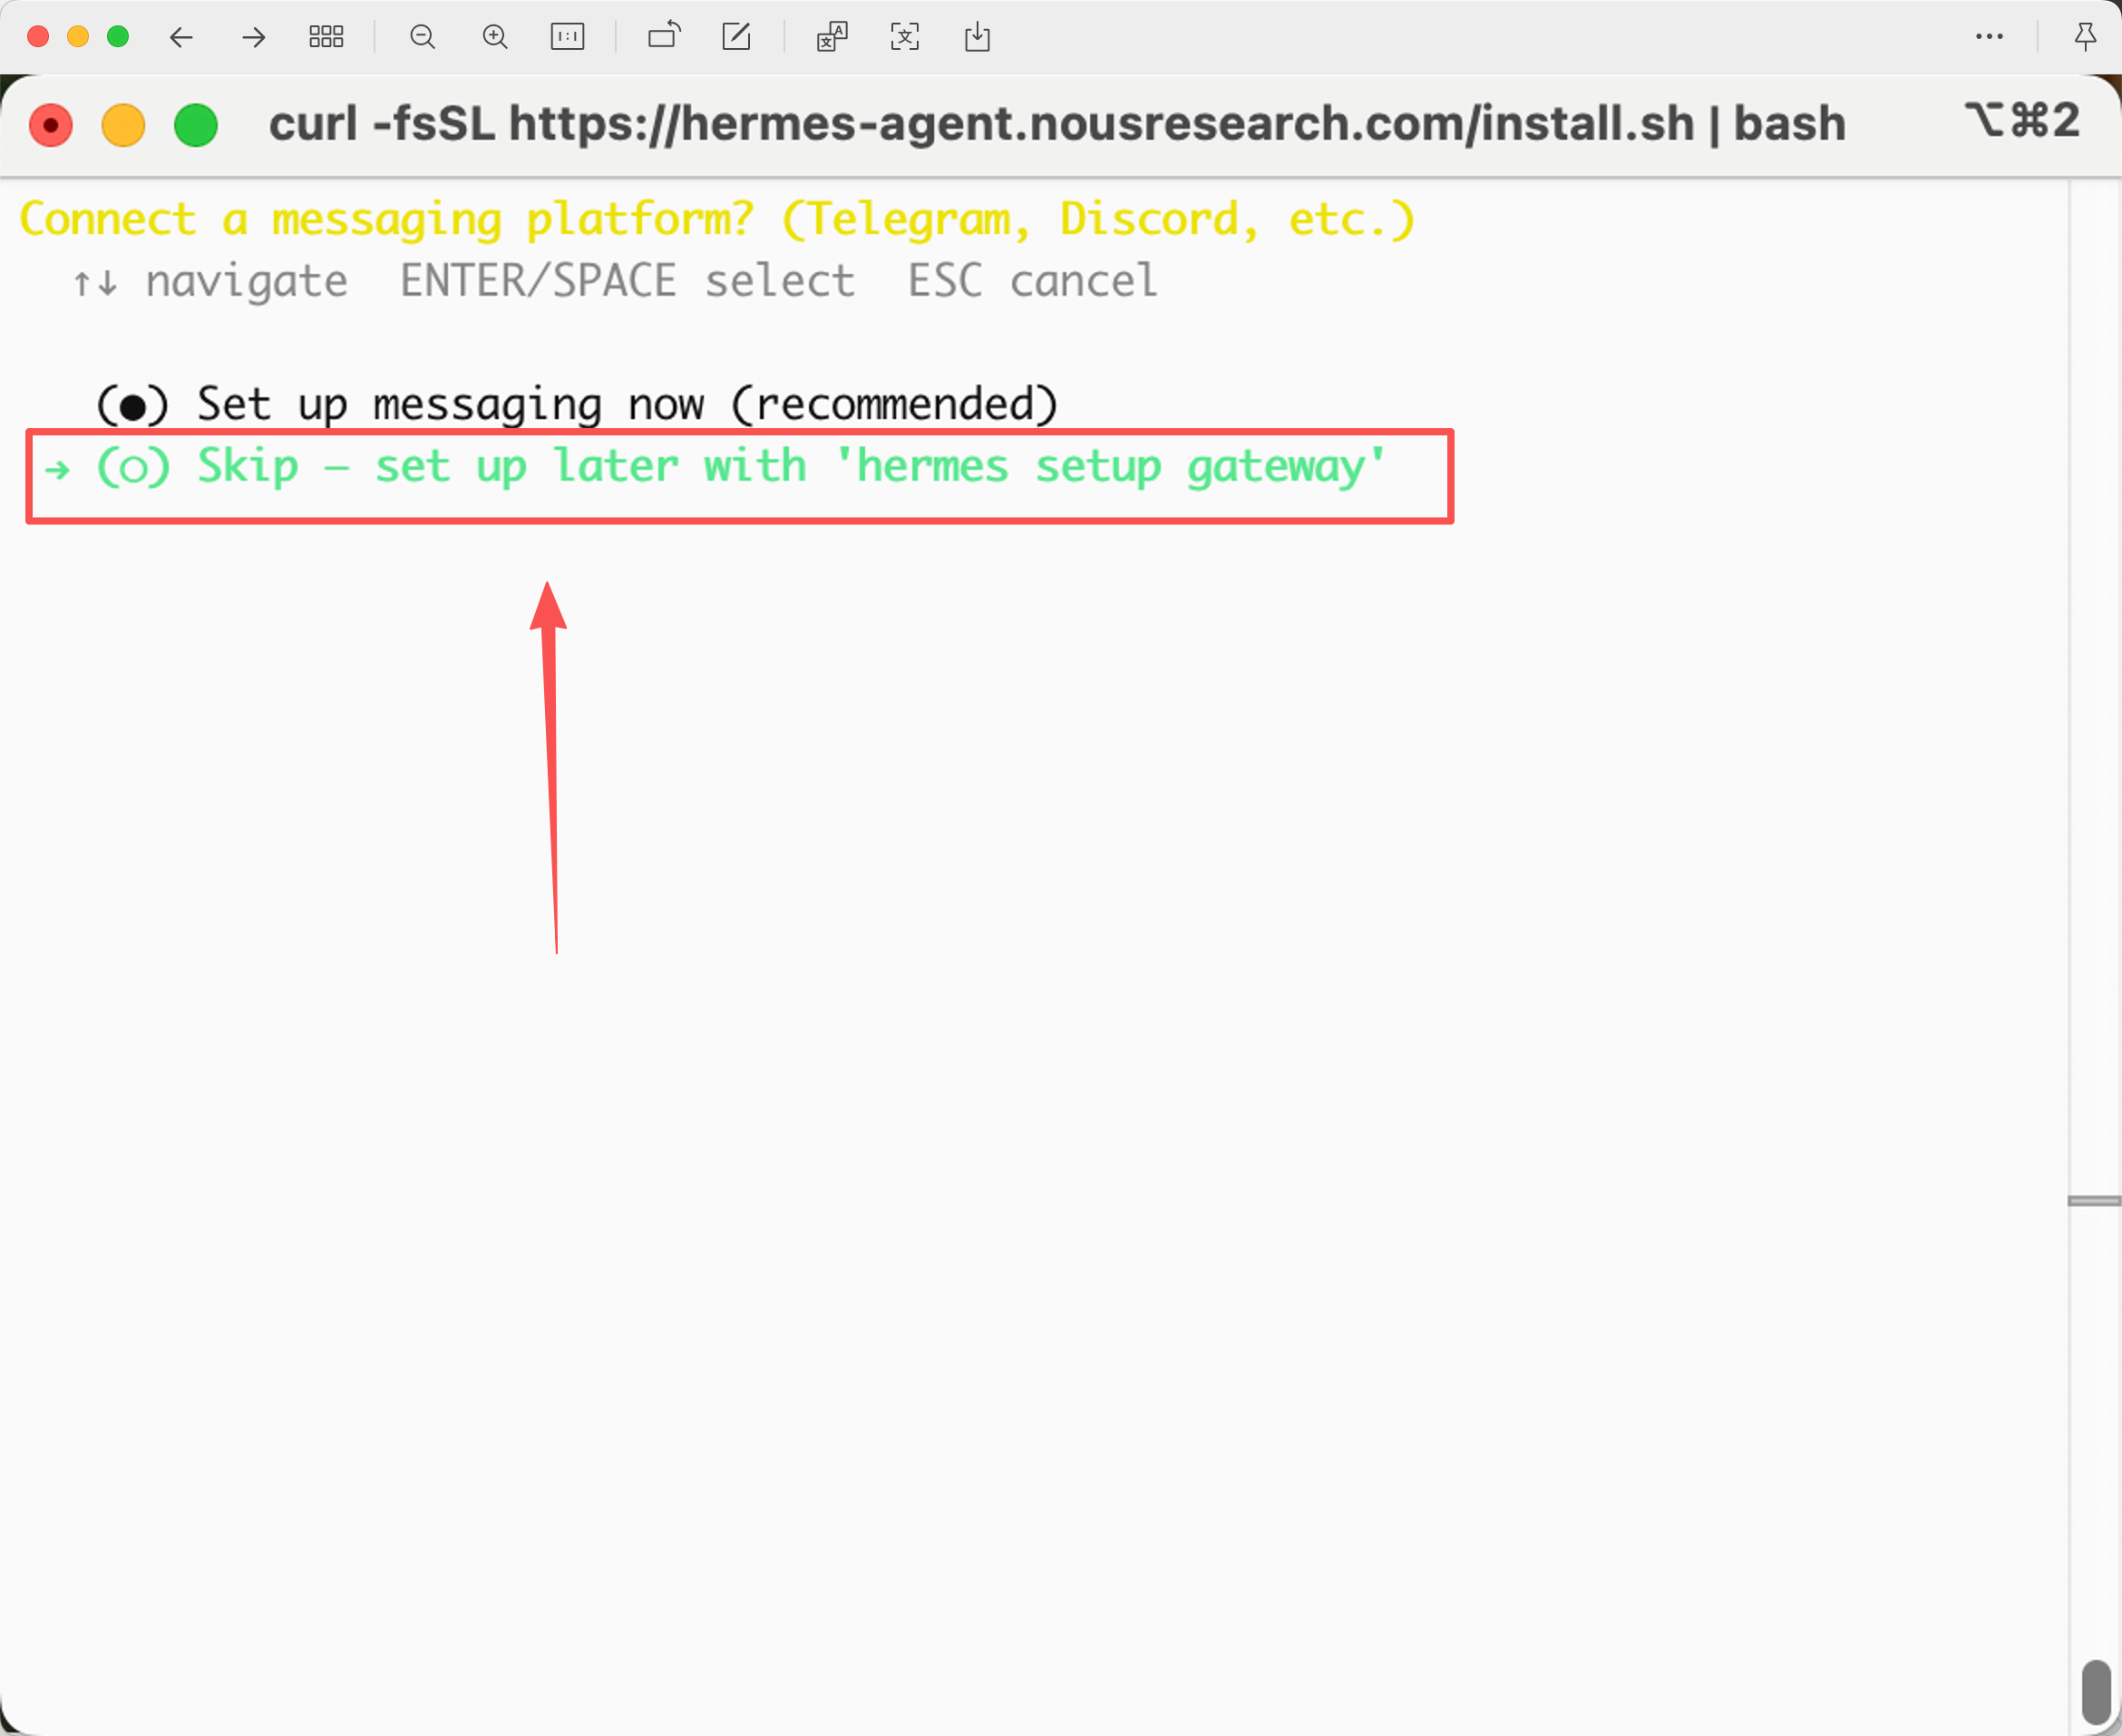
2.选择“快速设置(Quick Setup)”,选择“跳过信息平台设置”(Skip-set up later)
image
image

3.安装完成后,执行下面这条让 hermes 在当前终端立即可用

bash
1source $HOME/.local/bin/env

重新打开 WSL 终端后就不用再执行 source 了,安装脚本已经自动配好了路径。
如遇到报错:-bash: /home/he1124/.local/bin/env: No such file or directory;
执行:sed -i '/source \$HOME\/.local\/bin\/env/s/^/#/' ~/.bashrc && source ~/.bashrc

3.配置

1.点击复制下面命令,弹窗处填写您创建的API key,然后复制代码到终端回车执行

bash
1mkdir -p ~/.hermes && cat > ~/.hermes/config.yaml << 'EOF'
2model:
3 default: claude-opus-4-8
4 provider: aicodewith-claude
5
6custom_providers:
7- name: aicodewith-claude
8 base_url: https://api.aicodewith.com
9 api_key: 在这里替换成你的_API_KEY
10 api_mode: anthropic_messages
11
12- name: aicodewith-openai
13 base_url: https://api.aicodewith.com/v1
14 api_key: 在这里替换成你的_API_KEY
15 api_mode: chat_completions
16
17- name: aicodewith-gemini
18 base_url: https://api.aicodewith.com/gemini_cli/v1beta
19 api_key: 在这里替换成你的_API_KEY
20 api_mode: chat_completions
21
22- name: aicodewith-deepseek
23 base_url: https://api.aicodewith.com/v1
24 api_key: 在这里替换成你的_API_KEY
25 api_mode: chat_completions
26
27- name: aicodewith-glm
28 base_url: https://api.aicodewith.com/v1
29 api_key: 在这里替换成你的_API_KEY
30 api_mode: chat_completions
31
32- name: aicodewith-minimax
33 base_url: https://api.aicodewith.com/v1
34 api_key: 在这里替换成你的_API_KEY
35 api_mode: chat_completions
36
37- name: aicodewith-kimi
38 base_url: https://api.aicodewith.com/v1
39 api_key: 在这里替换成你的_API_KEY
40 api_mode: chat_completions
41
42- name: aicodewith-qwen
43 base_url: https://api.aicodewith.com/v1
44 api_key: 在这里替换成你的_API_KEY
45 api_mode: chat_completions
46
47- name: aicodewith-step
48 base_url: https://api.aicodewith.com/v1
49 api_key: 在这里替换成你的_API_KEY
50 api_mode: chat_completions
51
52- name: aicodewith-bytedance
53 base_url: https://api.aicodewith.com/v1
54 api_key: 在这里替换成你的_API_KEY
55 api_mode: chat_completions
56
57compression:
58 summary_model: claude-haiku-4-5-20251001
59EOF

4.验证

1.终端粘贴下面命令,回车

bash
1hermes

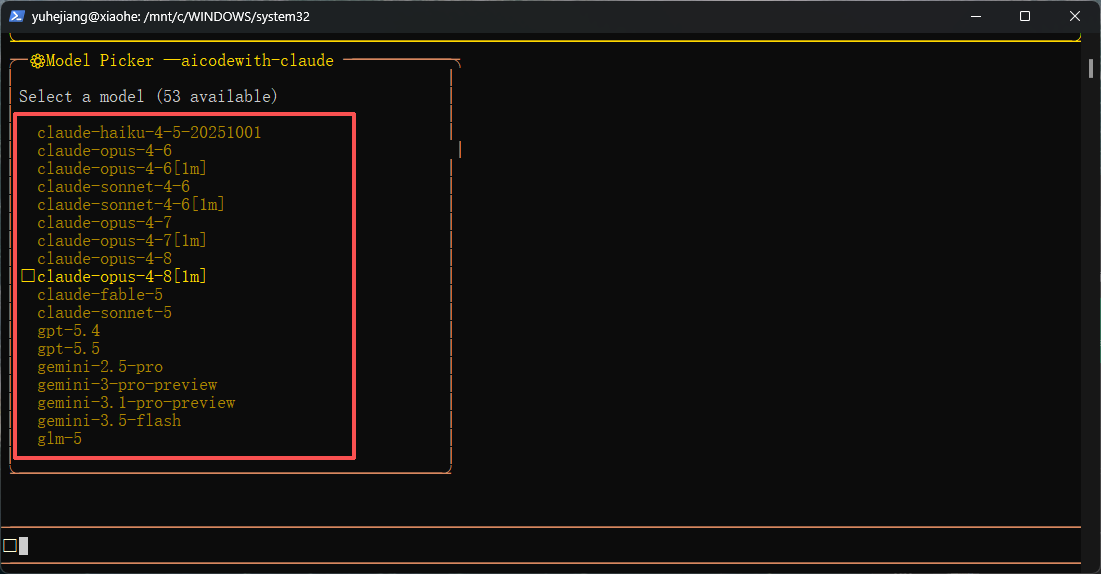
2./model 选择模型

image
image

3.测试对话,有正常回复即为安装成功啦

21b45420c78c1f6e58f4416e39b0673a
常用命令/model(查看和切换模型)↑ / ↓(浏览历史命令)Esc(撤回 / 退出)/help(列出所有可用命令)

配置微信Hermes

前置条件
1.按照上述教程已经安装好Hermes-agent
2.移动端和PC端微信版本为最新

1.运行接入

1.打开终端 (Linux/mac) 或 WSL(windows),运行

更新Hermes版本
1hermes update
配置网关接口
1hermes gateway setup

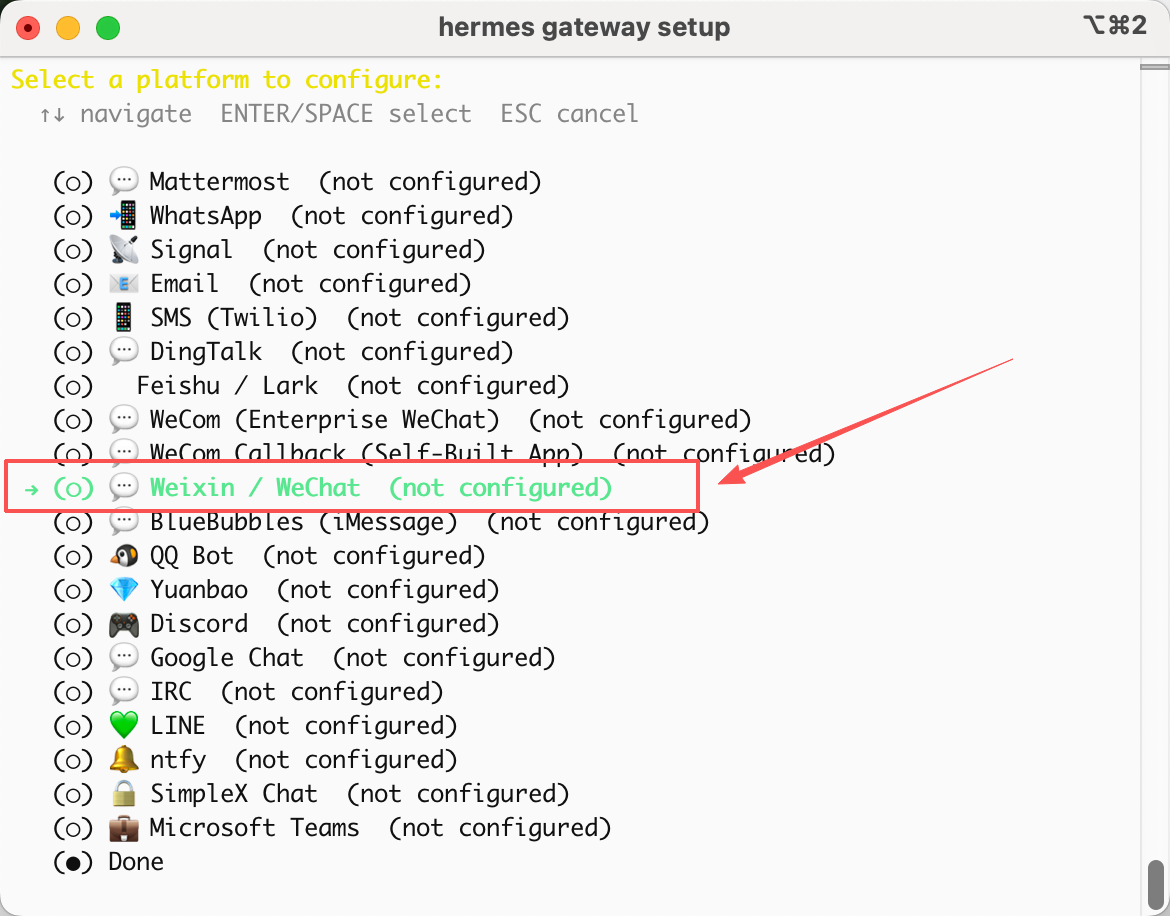
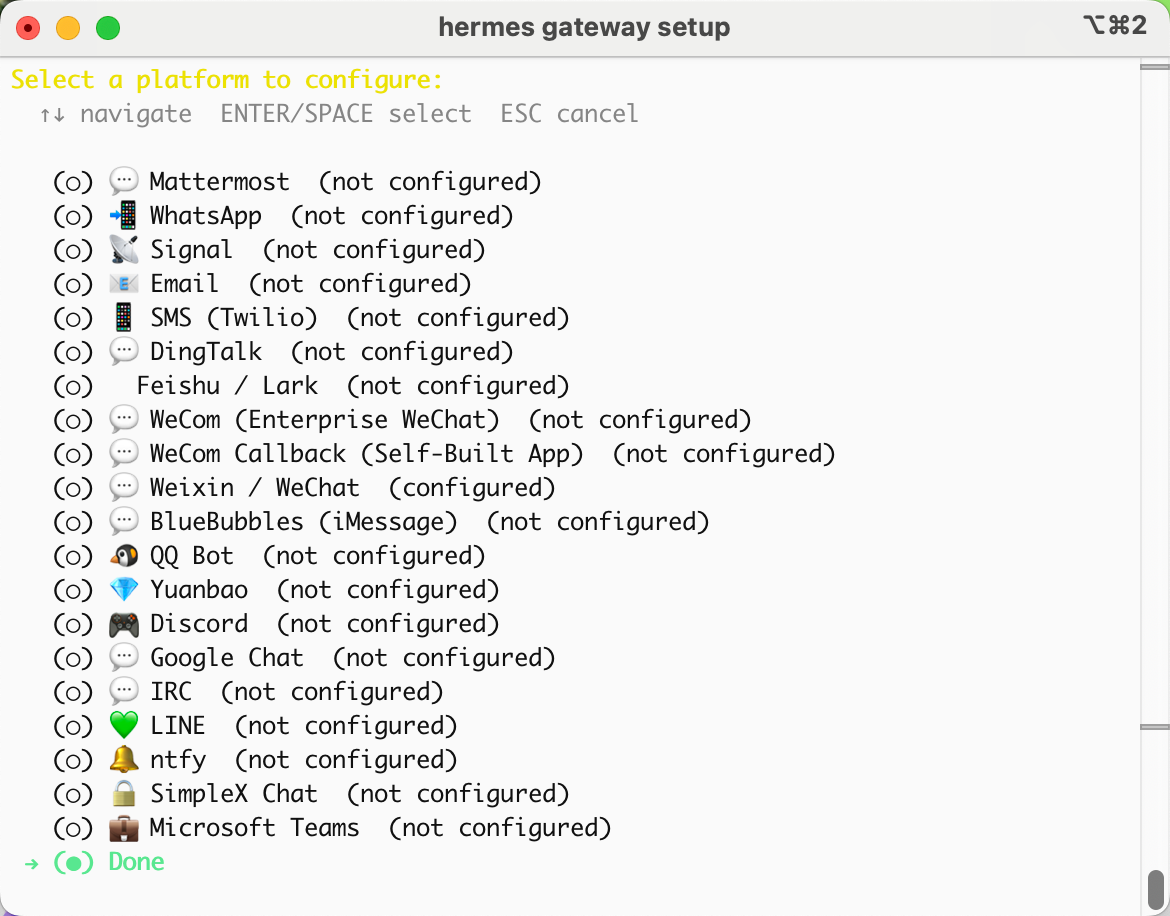
2.选择微信配置

e01892a4a39bb56b4e41dcad8c46f52a

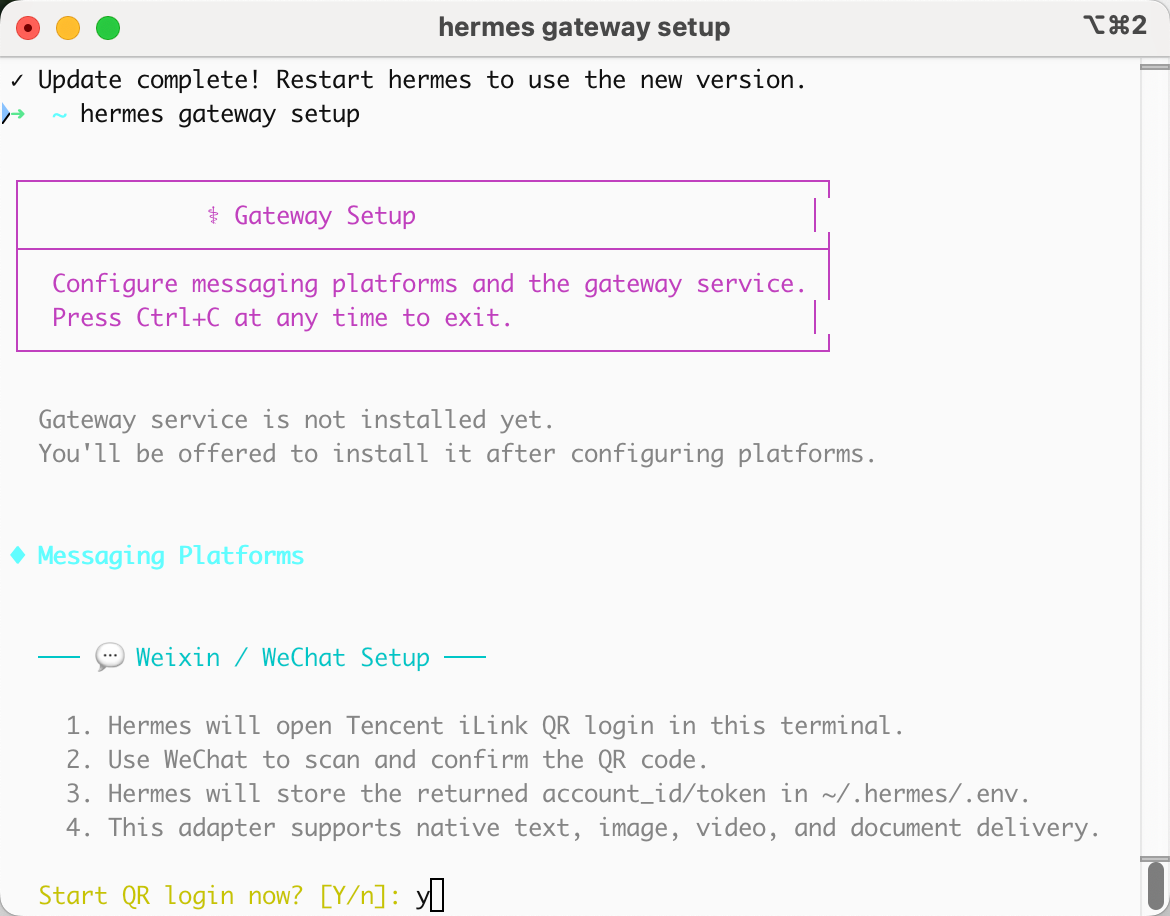
2.配置相关内容

1.输入 y 并回车

image

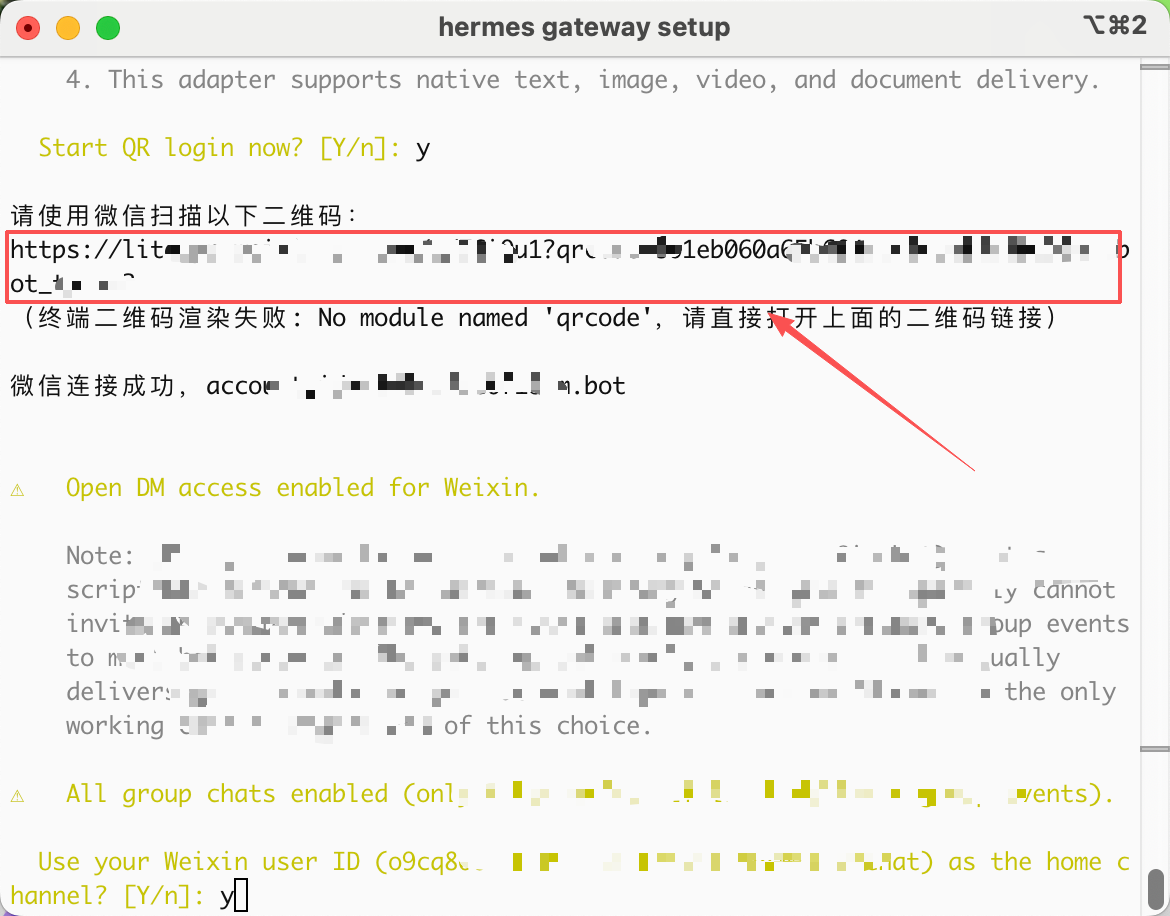
2.打开给的链接(选择复制粘贴到浏览器上即可打开),然后用微信app扫码

image

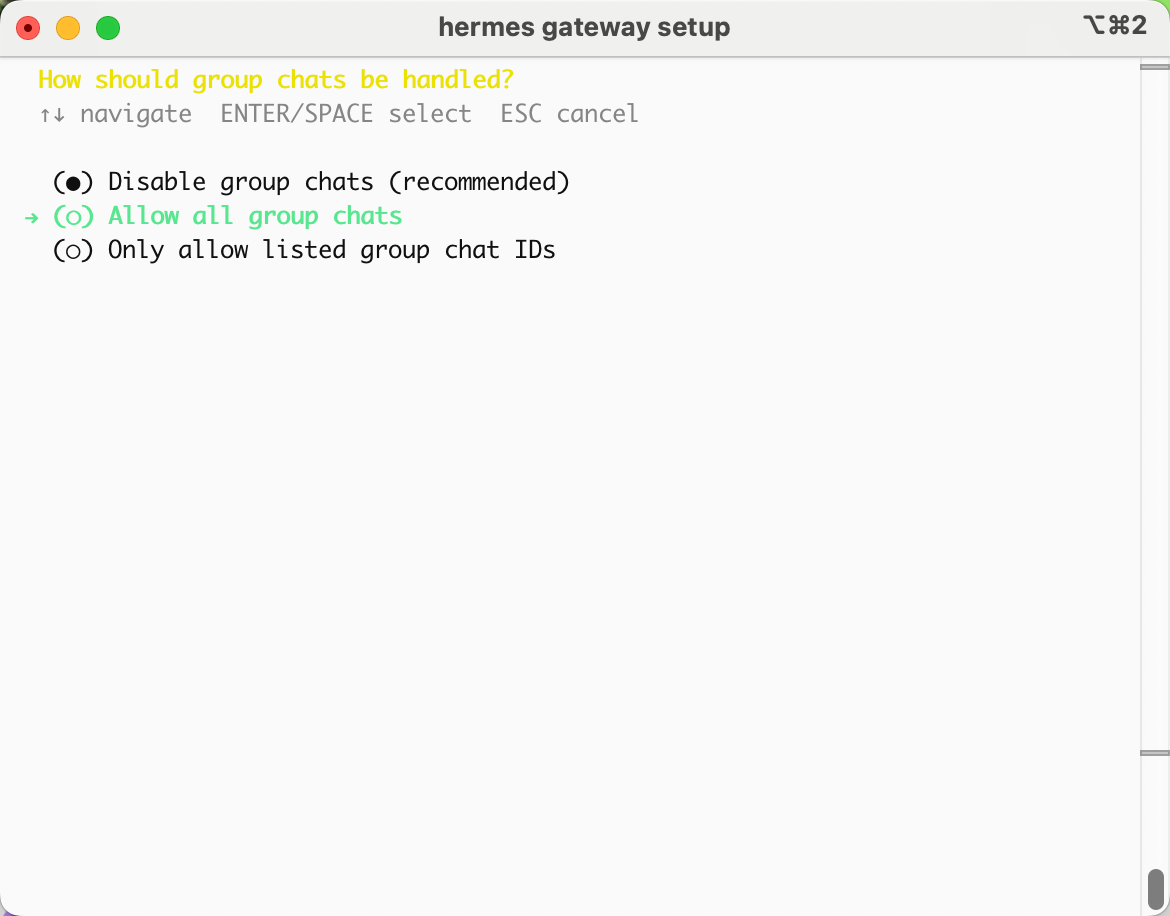
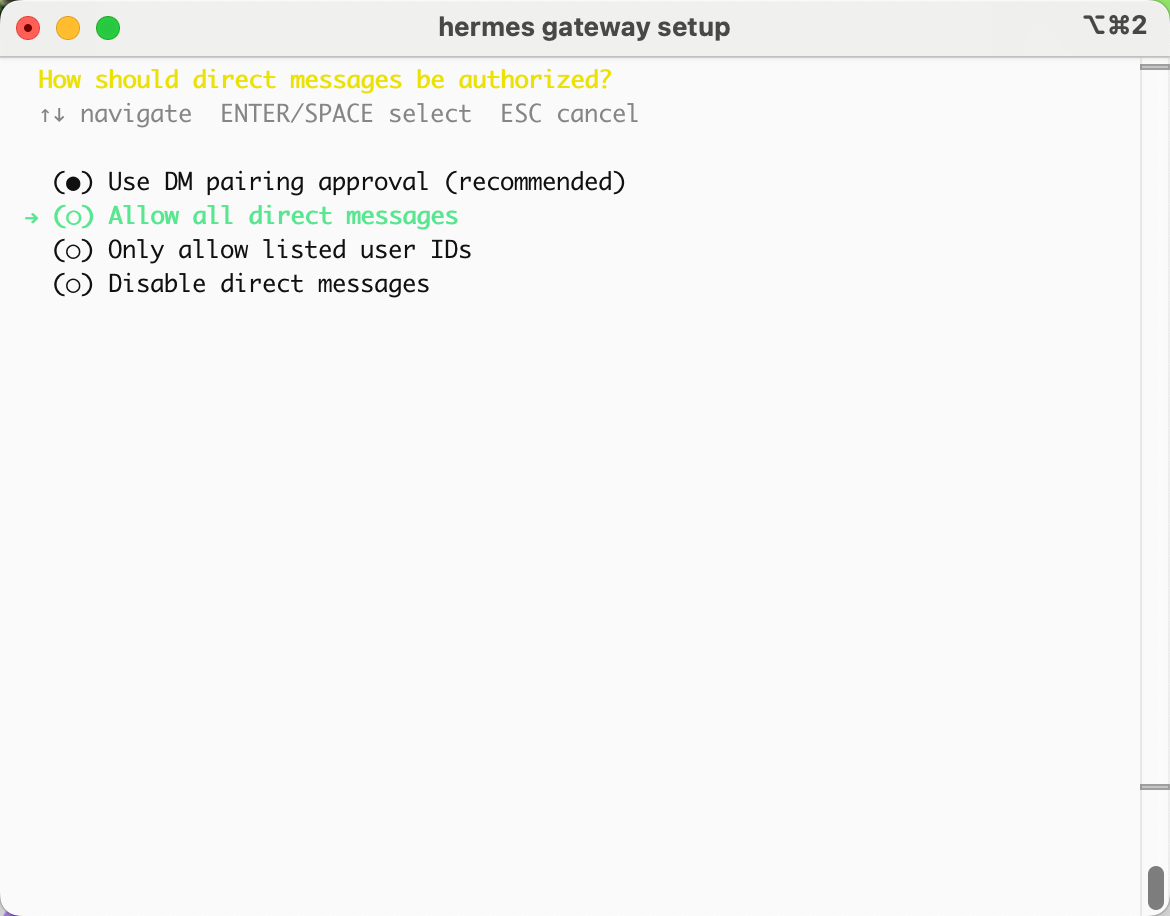
3.选择【Allow all direct messages】;选择【Allow all group chats】
image
image

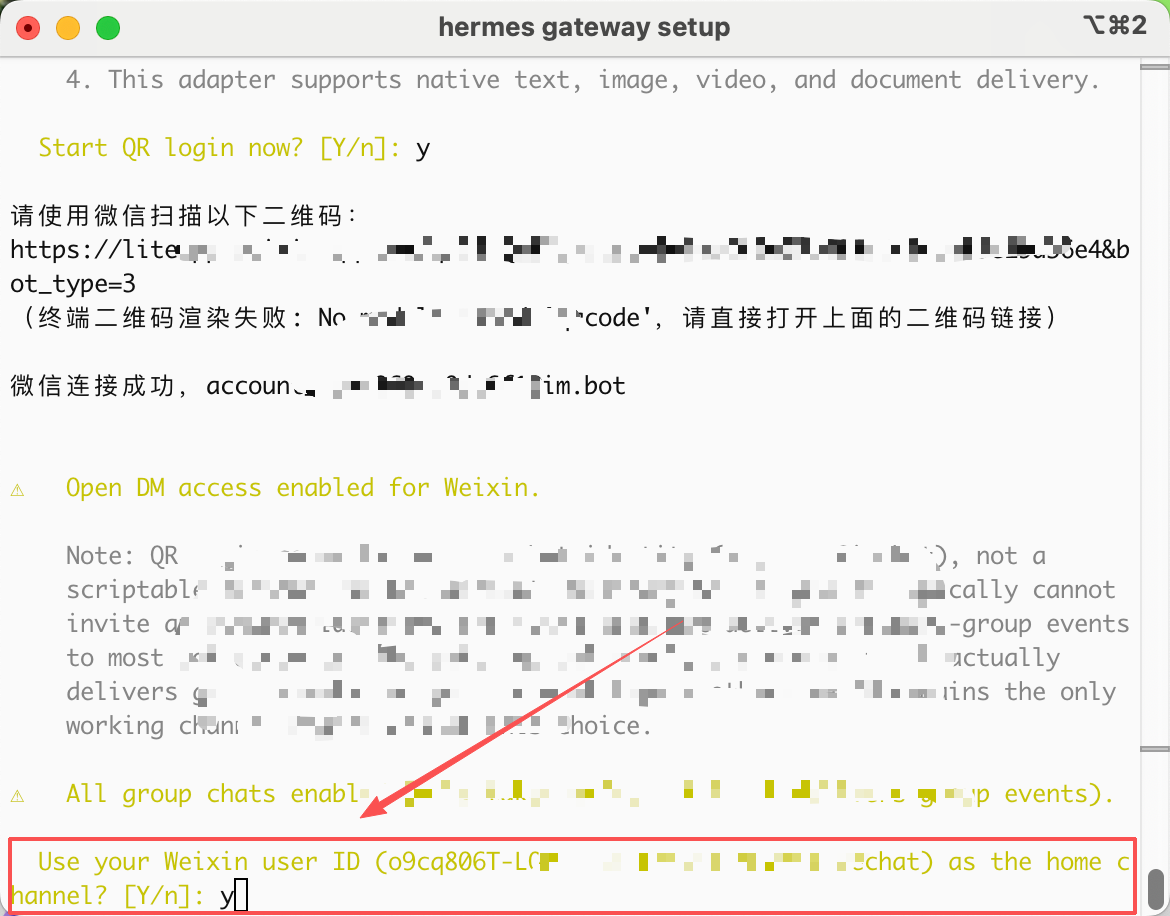
4.输入 y 并回车

image

5.选择【Done】

image

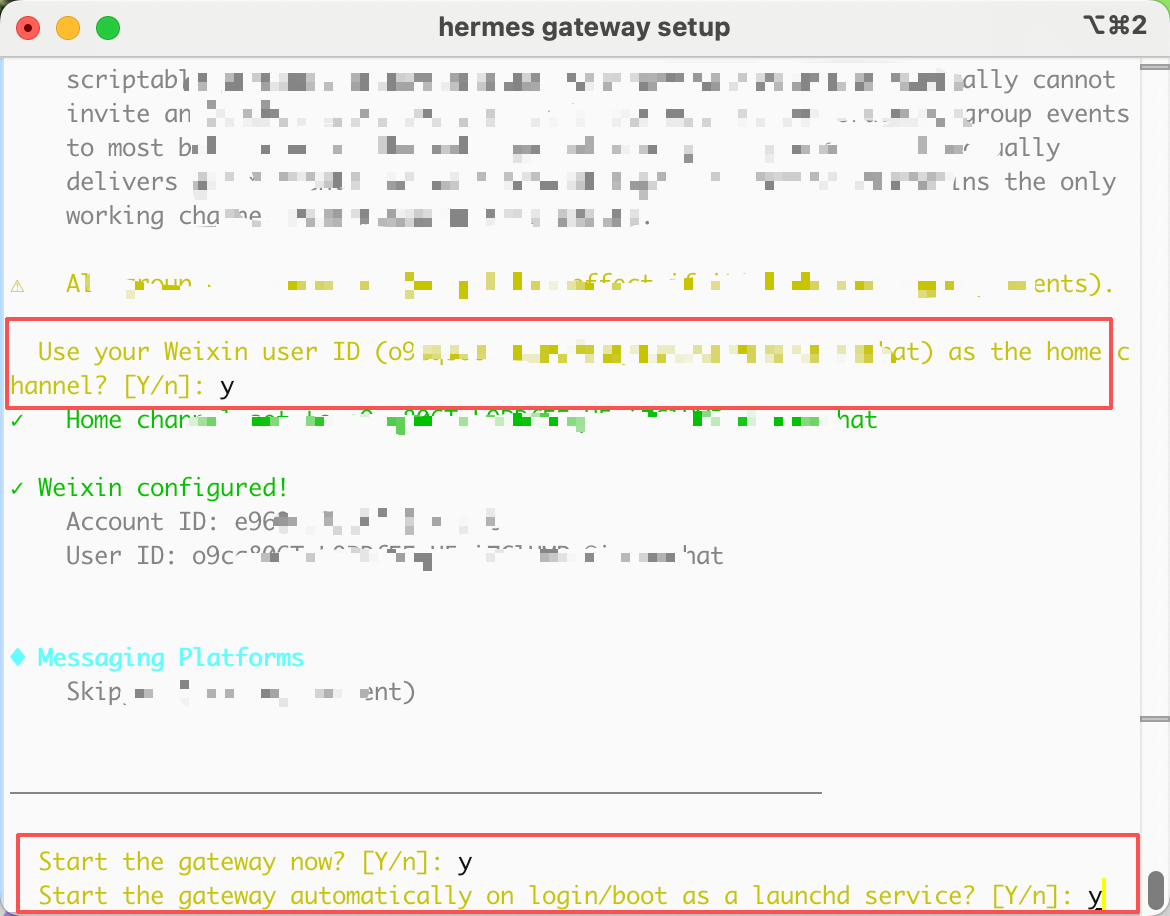
6.都输入 y 并回车
Start the gateway automatically on login/boot as a launchd service 为开机是否要自动启动,可选n,选择不自动启动)
ef8c6e7d67cb3e3b5abadd26e92a521f

3.测试

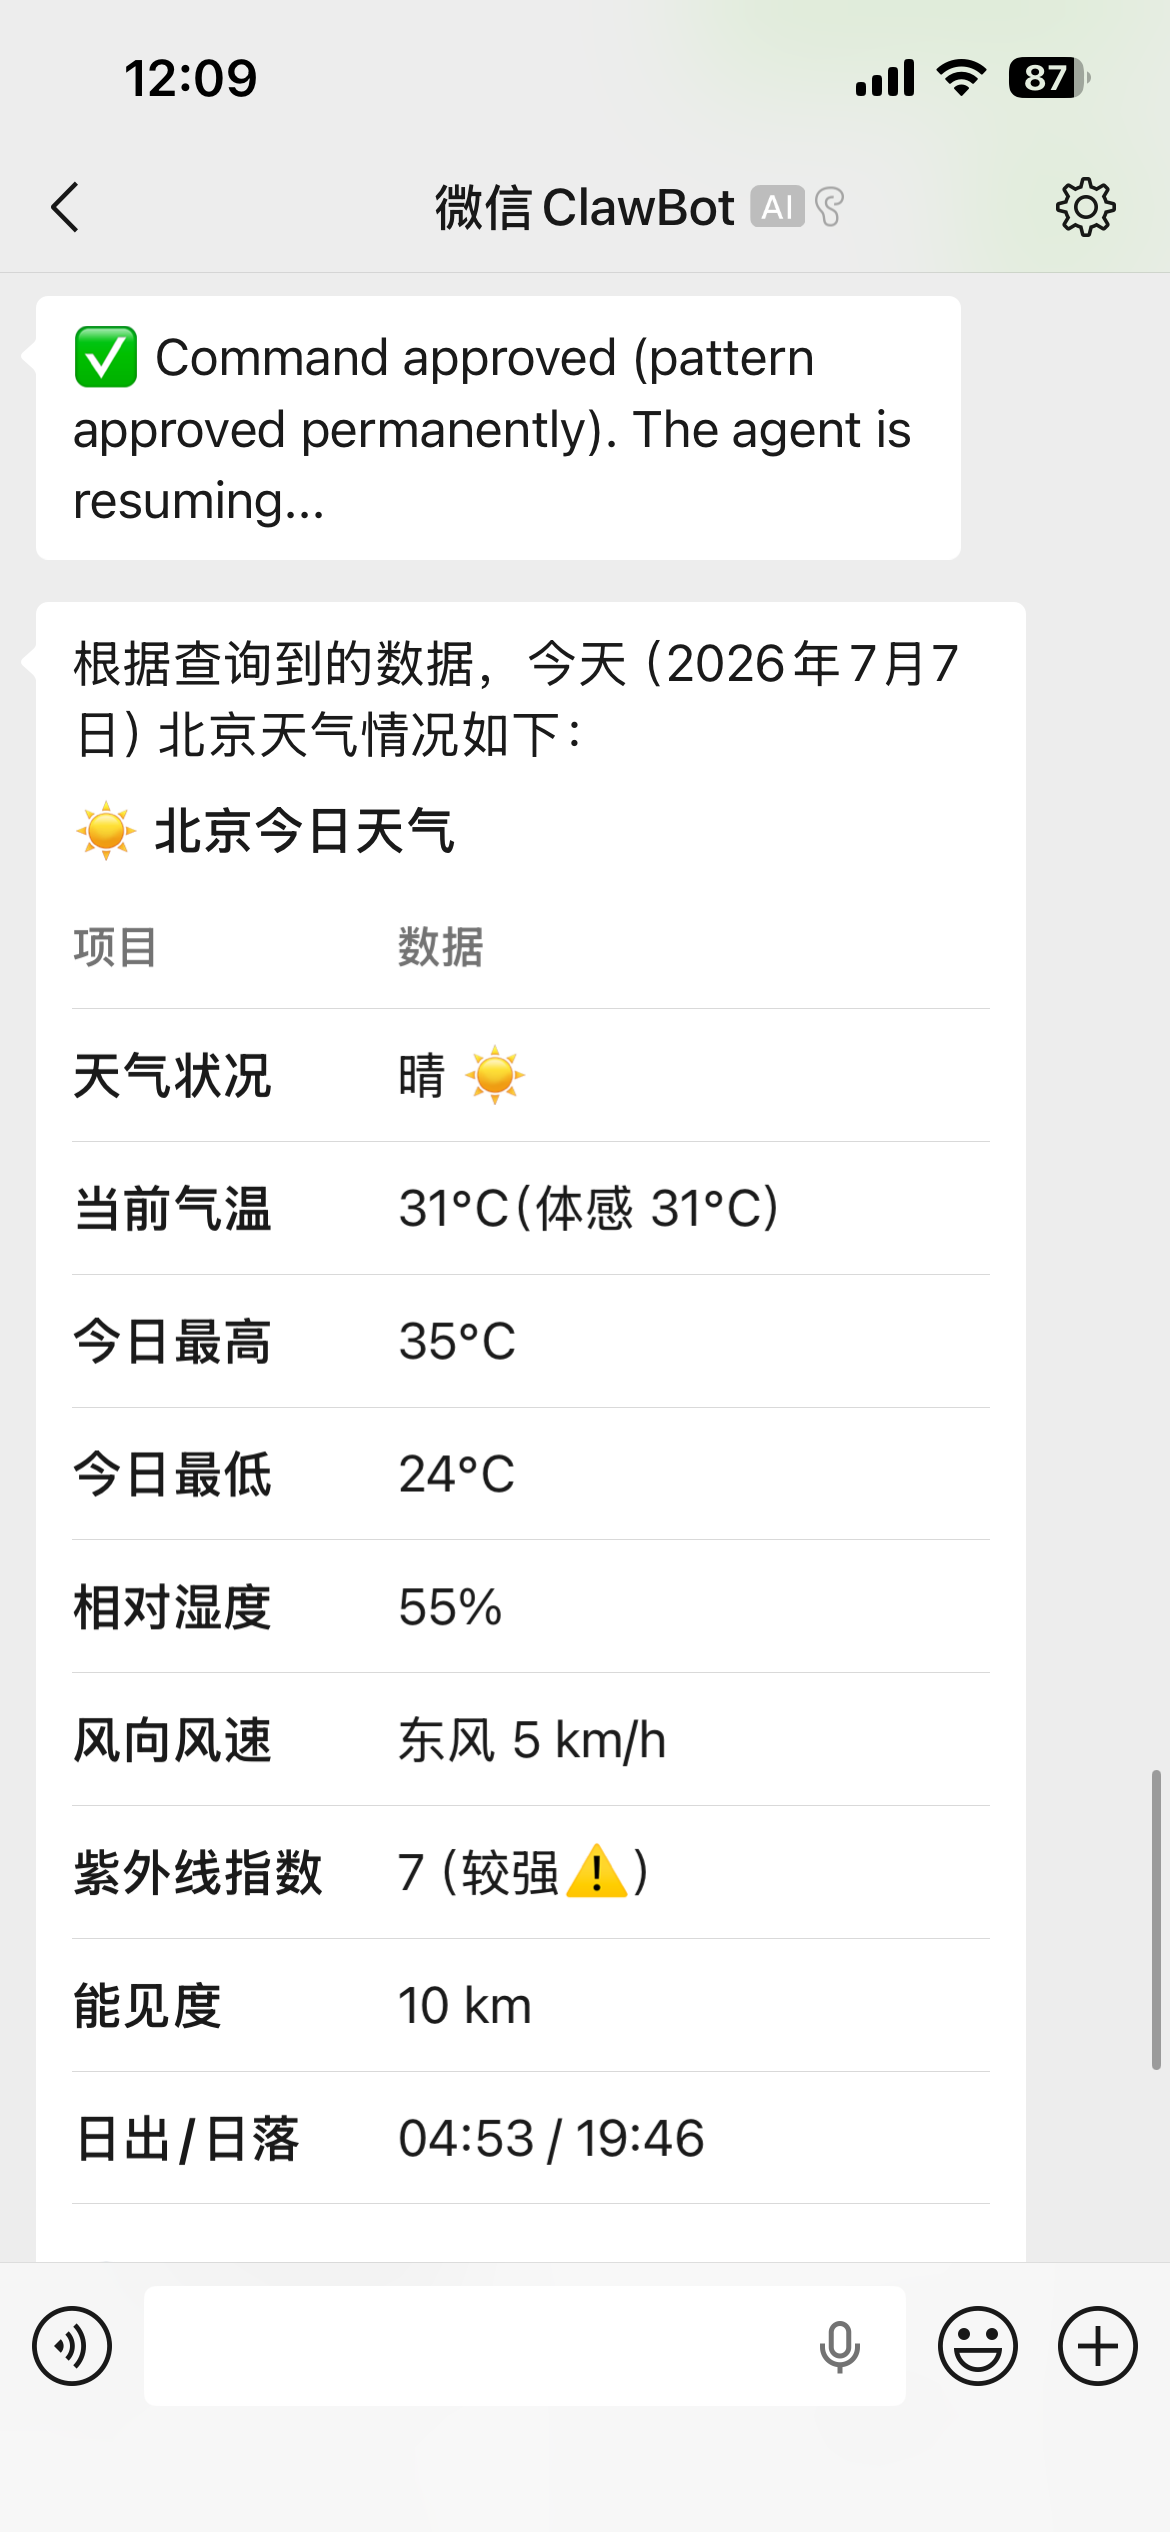
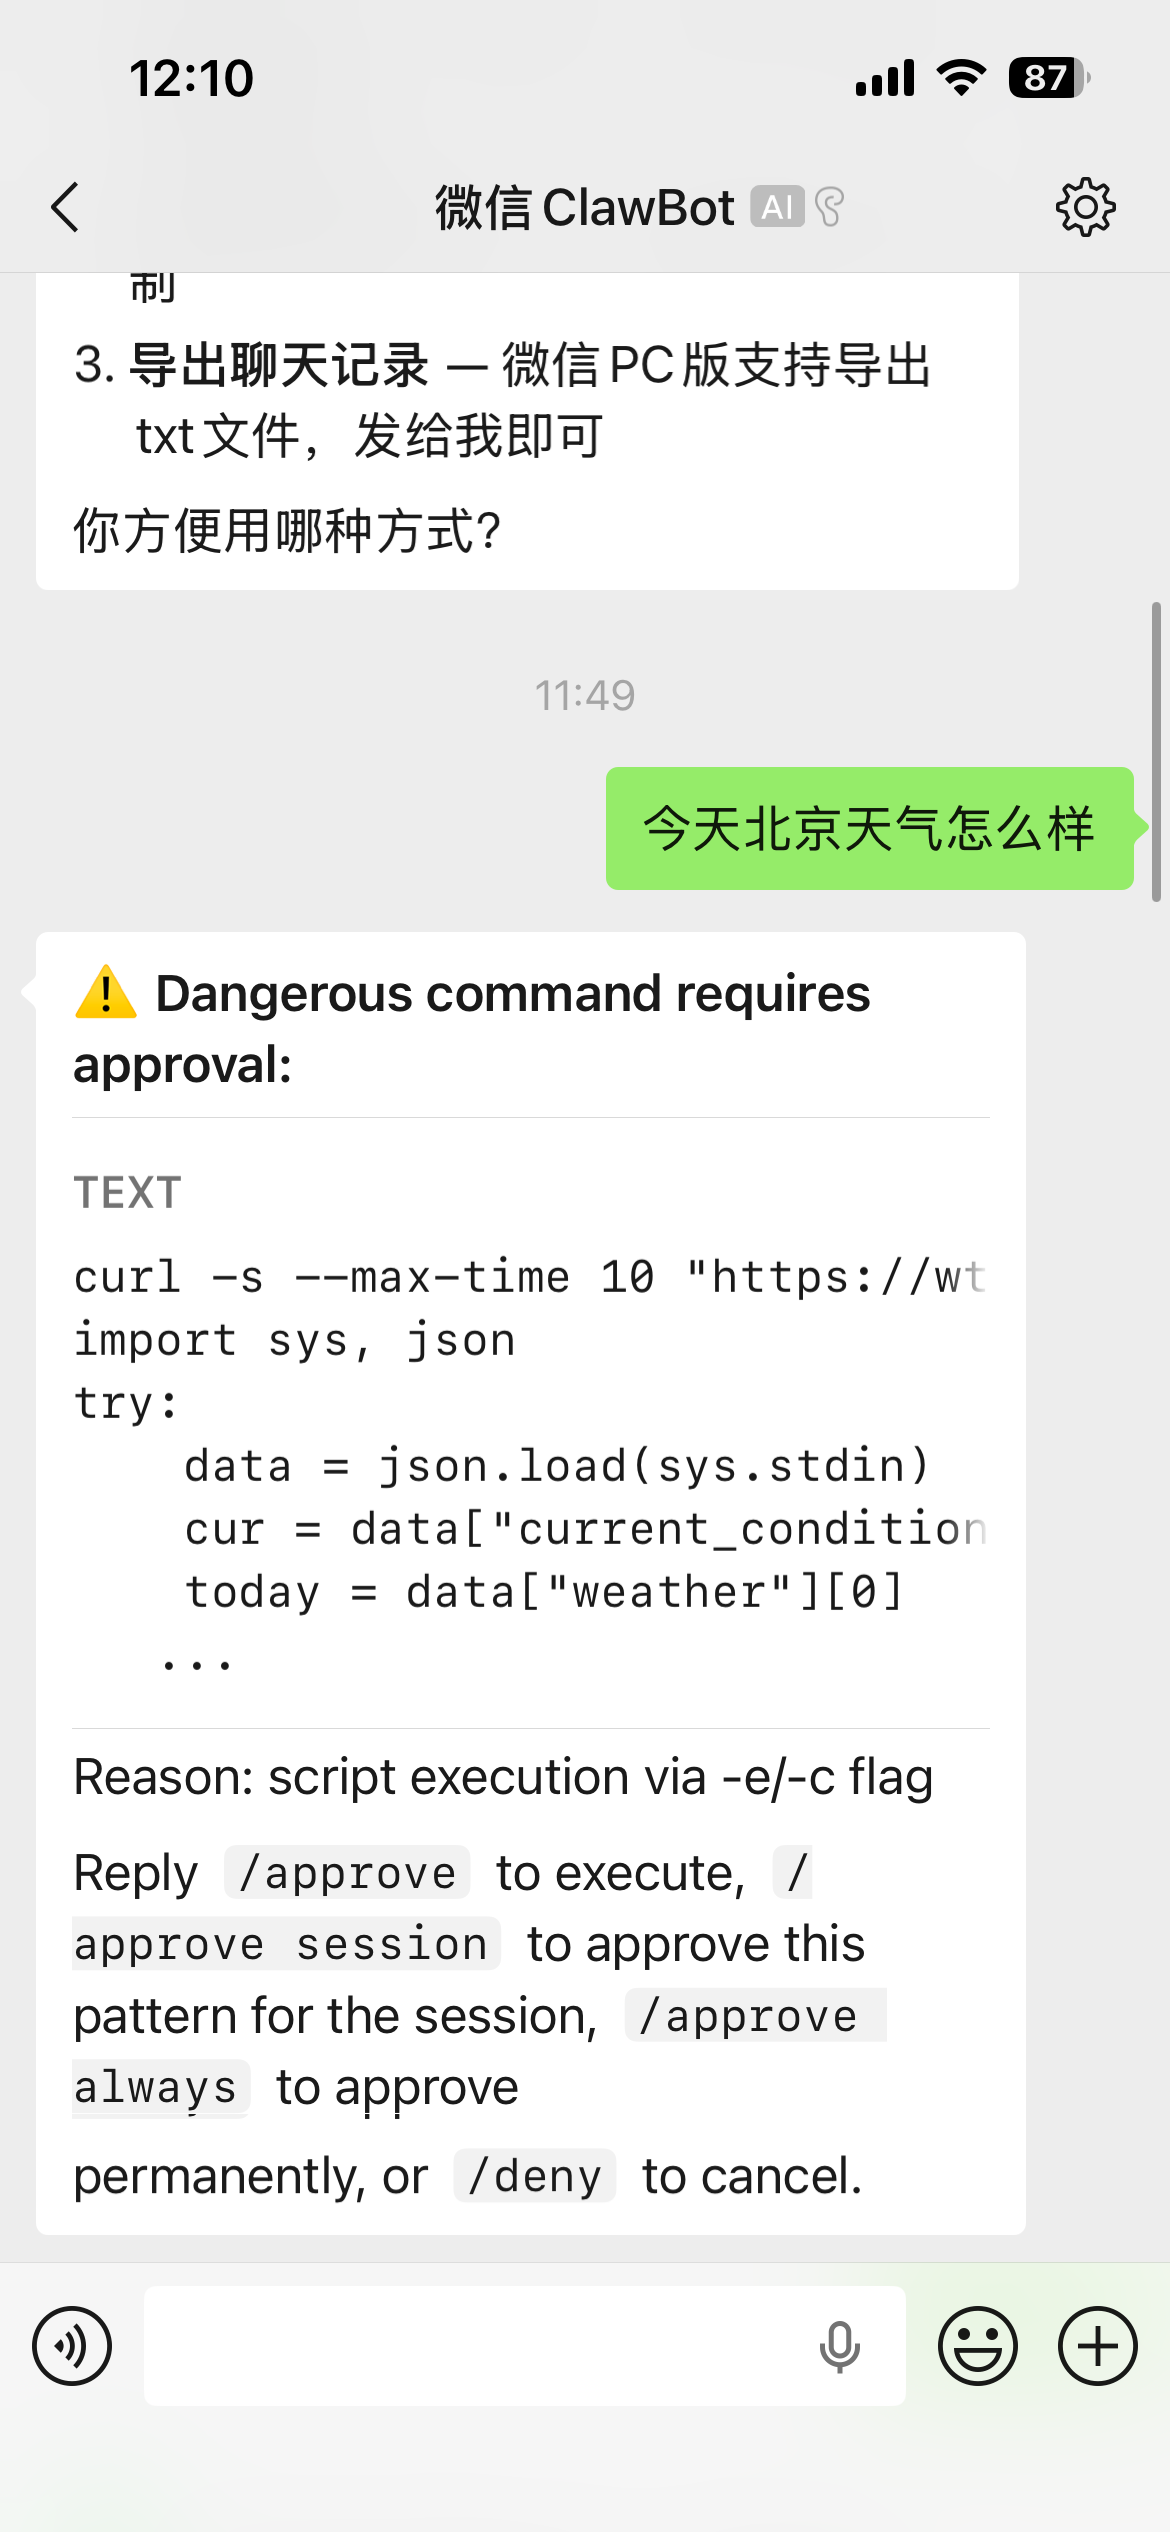
1.因为 execute_code(执行代码)属于高风险操作 —— 脚本可以创建子进程、修改文件等,所以 Hermes 的安全机制会暂停执行,要求你手动批准。

/approve 仅批准这一次执行
/approve session 本次会话内同类操作都自动批准
/approve always 永久批准此类操作(以后不再询问)
/deny 拒绝执行,取消这次操作

根据您的需求执行即可
e6e966e7a5fc615f46e0db2fa7ced80b

2.正常回复,就可以使用啦

53f7923045b11098f5243f58494d8d39